In this article we will see the steps of “How to install & Uninstall Mysql Workbench on Windows?”
How to install Mysql Workbench on Windows?
Introduction:
MySQL Workbench is a powerful and user-friendly graphical tool for managing MySQL databases. Whether you are a database administrator, developer, or data analyst, MySQL Workbench makes it easier to design, develop, and administer MySQL databases. In this tutorial, we will guide you through the step-by-step process of installing MySQL Workbench on a Windows computer.
Prerequisites:
- A Windows computer with administrative privileges.
Steps of “How to install Mysql Workbench on Windows?”
Let’s start steps of “How to install Mysql Workbench on Windows?”
Step #1: Download MySQL Workbench
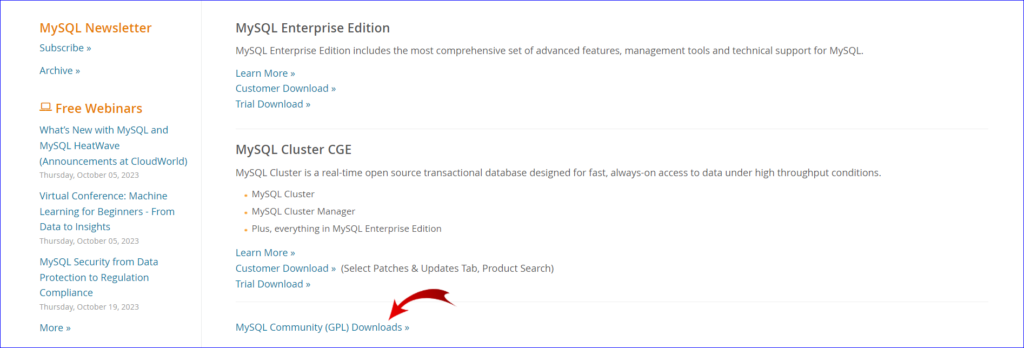
- Visit the official MySQL Workbench download page at https://www.mysql.com/.
- Click on downloads now.

- Scroll down, Click on MySQL Community (GPL) Downloads.
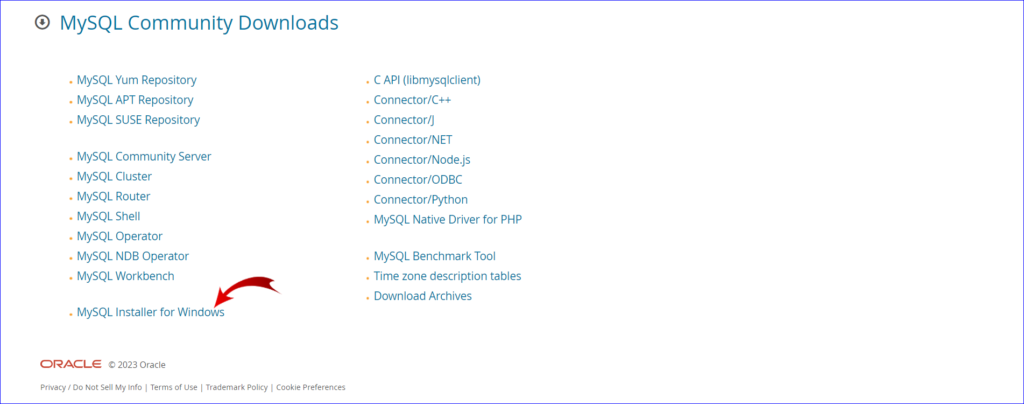
- Click on MySQL Installer for Windows.
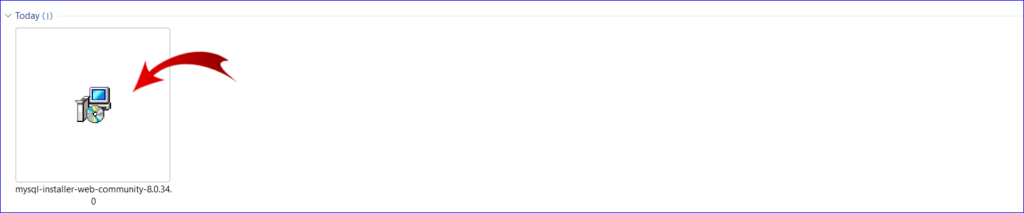
- Select your versions and click on Download of MSI Installer.

- Redirect to this page. So click on “No thanks, just start my download”.

Step #2: Run the Installer
- Locate the downloaded installer file (e.g., mysql-workbench-community-<version>-winx64.msi) and double-click on it to run the installer.
- The installer will start. Click “Next” on the initial screen.
Step #3: Accept the License Agreement
- Read and accept the MySQL Workbench license agreement by selecting the “I accept the terms in the License Agreement” option. Click “Next” to proceed.
Step #4: Choose Installation Type
- Choose the installation type. For most users, the “Full” installation, which includes all components, is suitable. You can also customize the installation if needed. Click “Next” to continue.

Step #5: Choose Installation Location
- Select the destination folder where MySQL Workbench will be installed. The default location is usually fine, but you can change it if necessary. Click “Next” to proceed.
Step #6: Start Installation
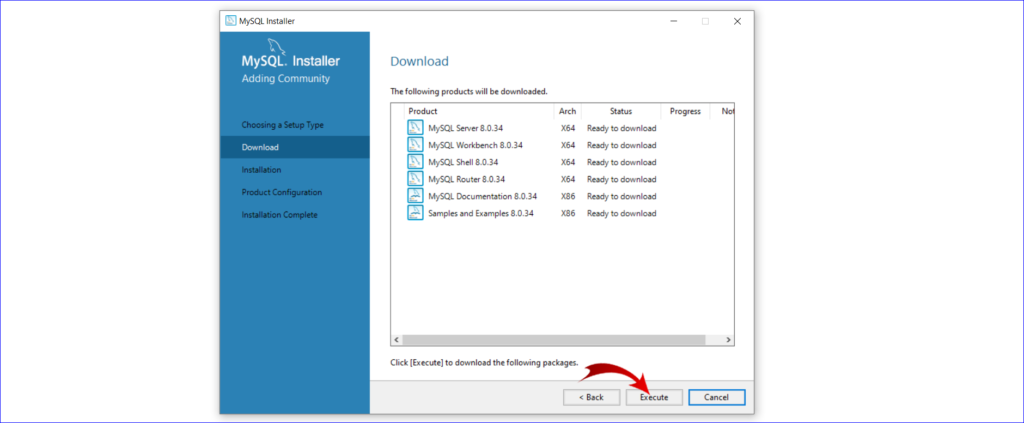
- Review your installation settings on the summary screen. Click “Install” to start the installation process.

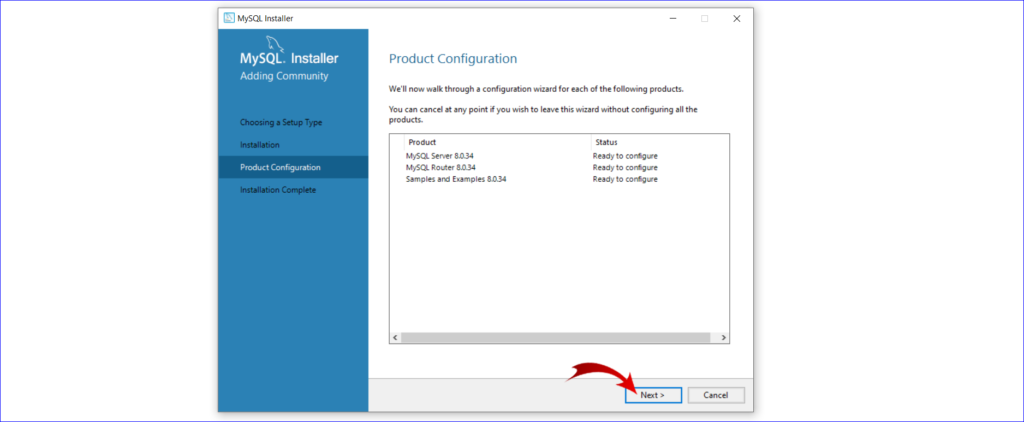
Step #7: Product Configuration
- Review your Product configuration on the summary screen. Click “Next” to next step.
Step #8: Authentication Method
- Verify the options of Authentication method and click on “Next”.

Step #9: Accounts and Roles
- Set the MySQL root password for you mysql dashboard access and click on “Next”.

Step #10: Windows Service
Verify your Windows service and make changes if any and click on “Next”

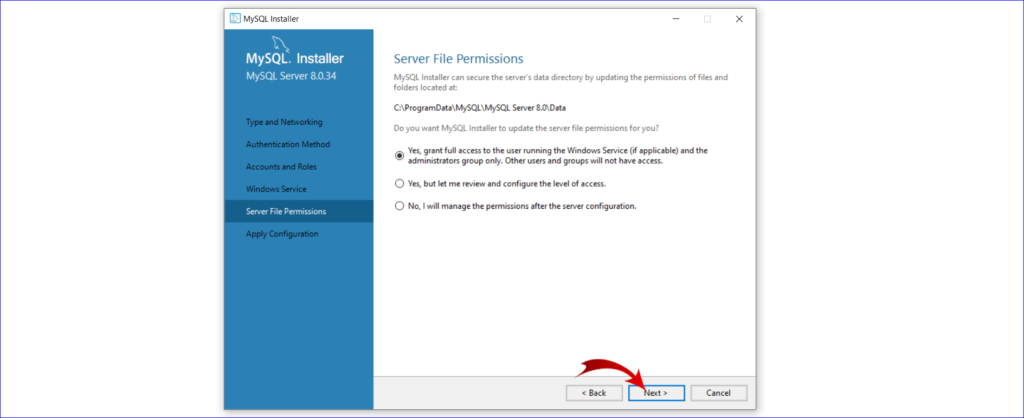
Step #11: Server File Permissions
- Verify the server file permissions and select as your need and click on “Next”.
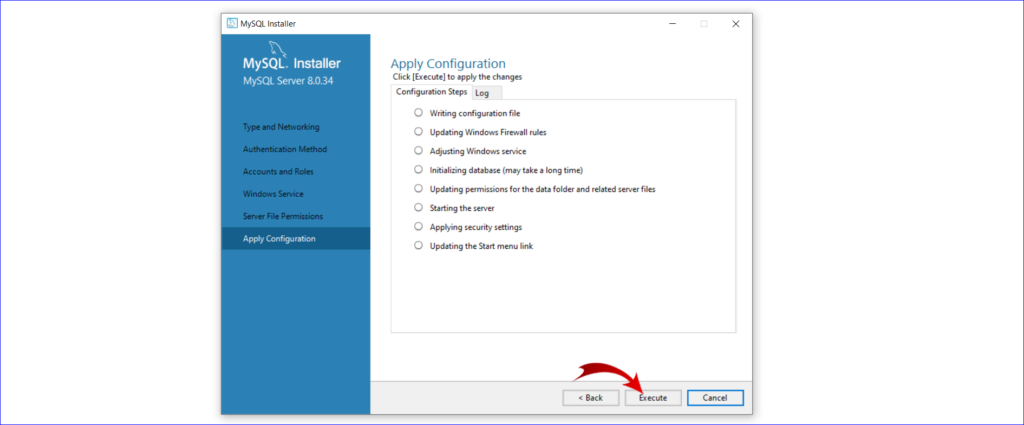
Step #12: Apply Configuration
- Verify the apply configuration files and click on “Execute” and after completion of download click on “Next”
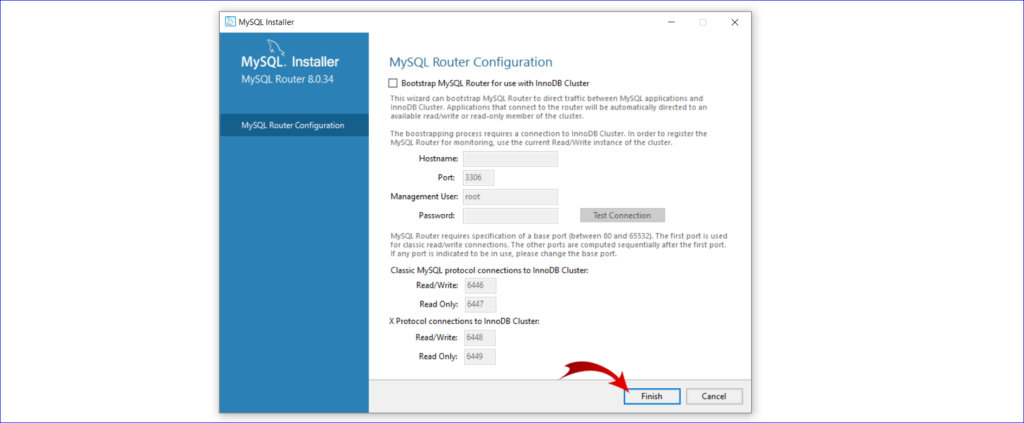
Step #13: MySQL Router Configuration
- Verify the Router configurations and click on “Next”.
Step #14: Installation Complete
Finally click on “Next” to complete the process of Installation of mysql on windows.

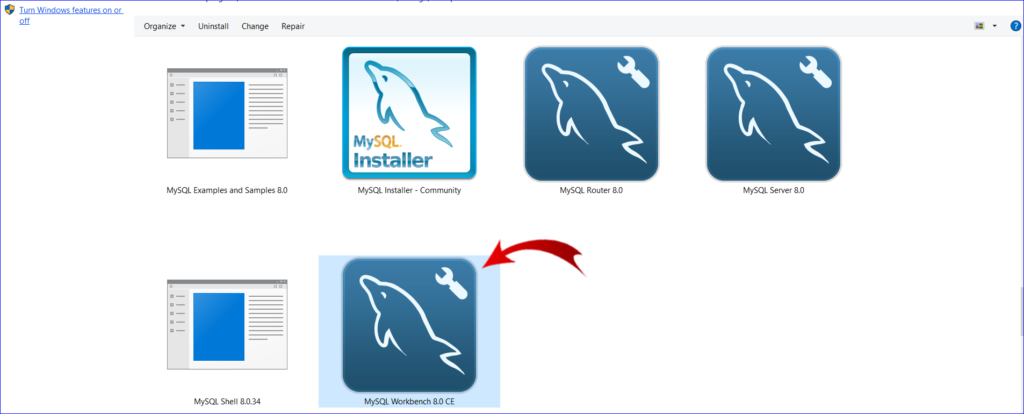
Step #15: Launch MySQL Workbench
- You can now find MySQL Workbench in your Windows Start Menu or on your Desktop. Launch the application by clicking on its icon.
- Upon opening MySQL Workbench, you can start configuring database connections and using it to manage your MySQL databases efficiently.
- Finally the mysql dashboard is like this picture. Select the Local instance and enter your root password which was set in the step 9.
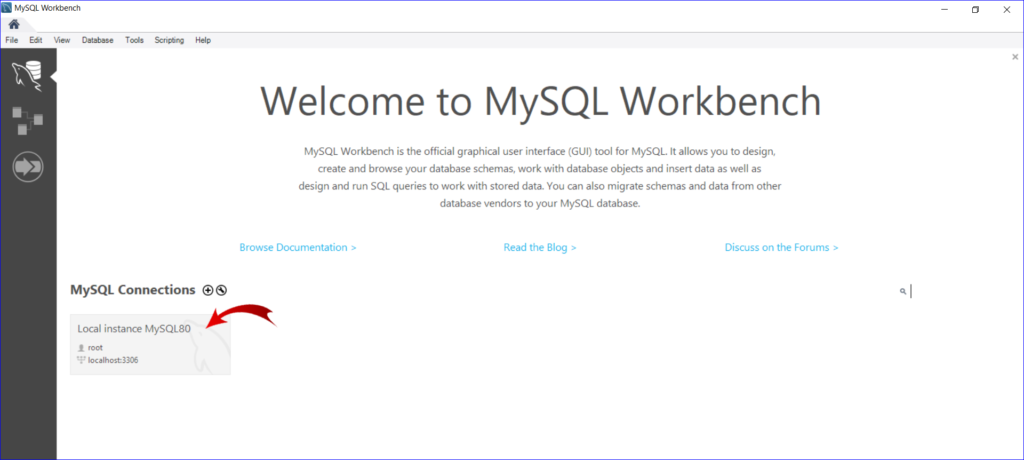
- The final mysql dashboard will be like.

How to Uninstall MySQL Workbench on Windows
Introduction:
MySQL Workbench is a valuable tool for database management, but there may come a time when you need to uninstall it from your Windows computer. Whether you’re upgrading to a new version, no longer need the software, or facing any other reason to uninstall MySQL Workbench, this guide will walk you through the process step by step.
Uninstalling MySQL Workbench on Windows:
Step #1: Open the Windows Control Panel
- To begin the uninstallation process, open the Windows Control Panel. You can do this by searching for “Control Panel” in the Windows search bar and clicking on the search result.
Step #2: Access “Programs and Features” or “Add or Remove Programs”
- Depending on your Windows version, you will see either “Programs and Features” or “Add or Remove Programs.” Click on the corresponding option.

Step #3: Locate MySQL Workbench in the Installed Programs List
- In the “Programs and Features” or “Add or Remove Programs” section, you will see a list of installed programs on your computer. Scroll through the list to find “MySQL Workbench.”
Step #4: Start the Uninstallation Process
- Select “MySQL Workbench” by clicking on it once to highlight it.
- Once MySQL Workbench is selected, you will typically see options to “Uninstall” or “Change.” Click on the “Uninstall” option.

This process will takes few minutes to uninstall the files.
Step #5: Confirm the Uninstallation
- A confirmation dialog will appear, asking if you are sure you want to uninstall MySQL Workbench. Confirm that you want to proceed with the uninstallation.
Step #6: Complete the Uninstallation
- Once the uninstallation process is finished, you will receive a message indicating that MySQL Workbench has been successfully removed from your computer.
- Like this process please uninstall all the files which are related to MySQL database from the Windows.
Step #7: Verify the Uninstallation
- To ensure that MySQL Workbench has been completely uninstalled, you can check your Start Menu, Desktop, and the list of installed programs in the Control Panel. MySQL Workbench should no longer appear in any of these locations.
Conclusion:
In this comprehensive guide, we’ve covered both the installation and uninstallation processes for MySQL Workbench on Windows. MySQL Workbench is a powerful tool for managing MySQL databases, and knowing how to install and uninstall it is essential for database administrators, developers, and anyone working with MySQL databases.
For Reference:
Visit official website of Mysql workbench on windows.
Related Articles:
Setup Kubernetes cluster on Ubuntu 20.04 LTS using kubeadm
Any queries pls contact us
https://rushiinfotech.in/contact/

![How to Install MobaXterm in Windows 10 [7 Steps]](https://rushiinfotech.in/wp-content/uploads/2023/09/How-to-Install-MobaXterm-in-Windows-10-7-Steps.png)