In this article we are going to cover GitHub Actions Tutorial with Practicals.
What is GitHub Actions ?
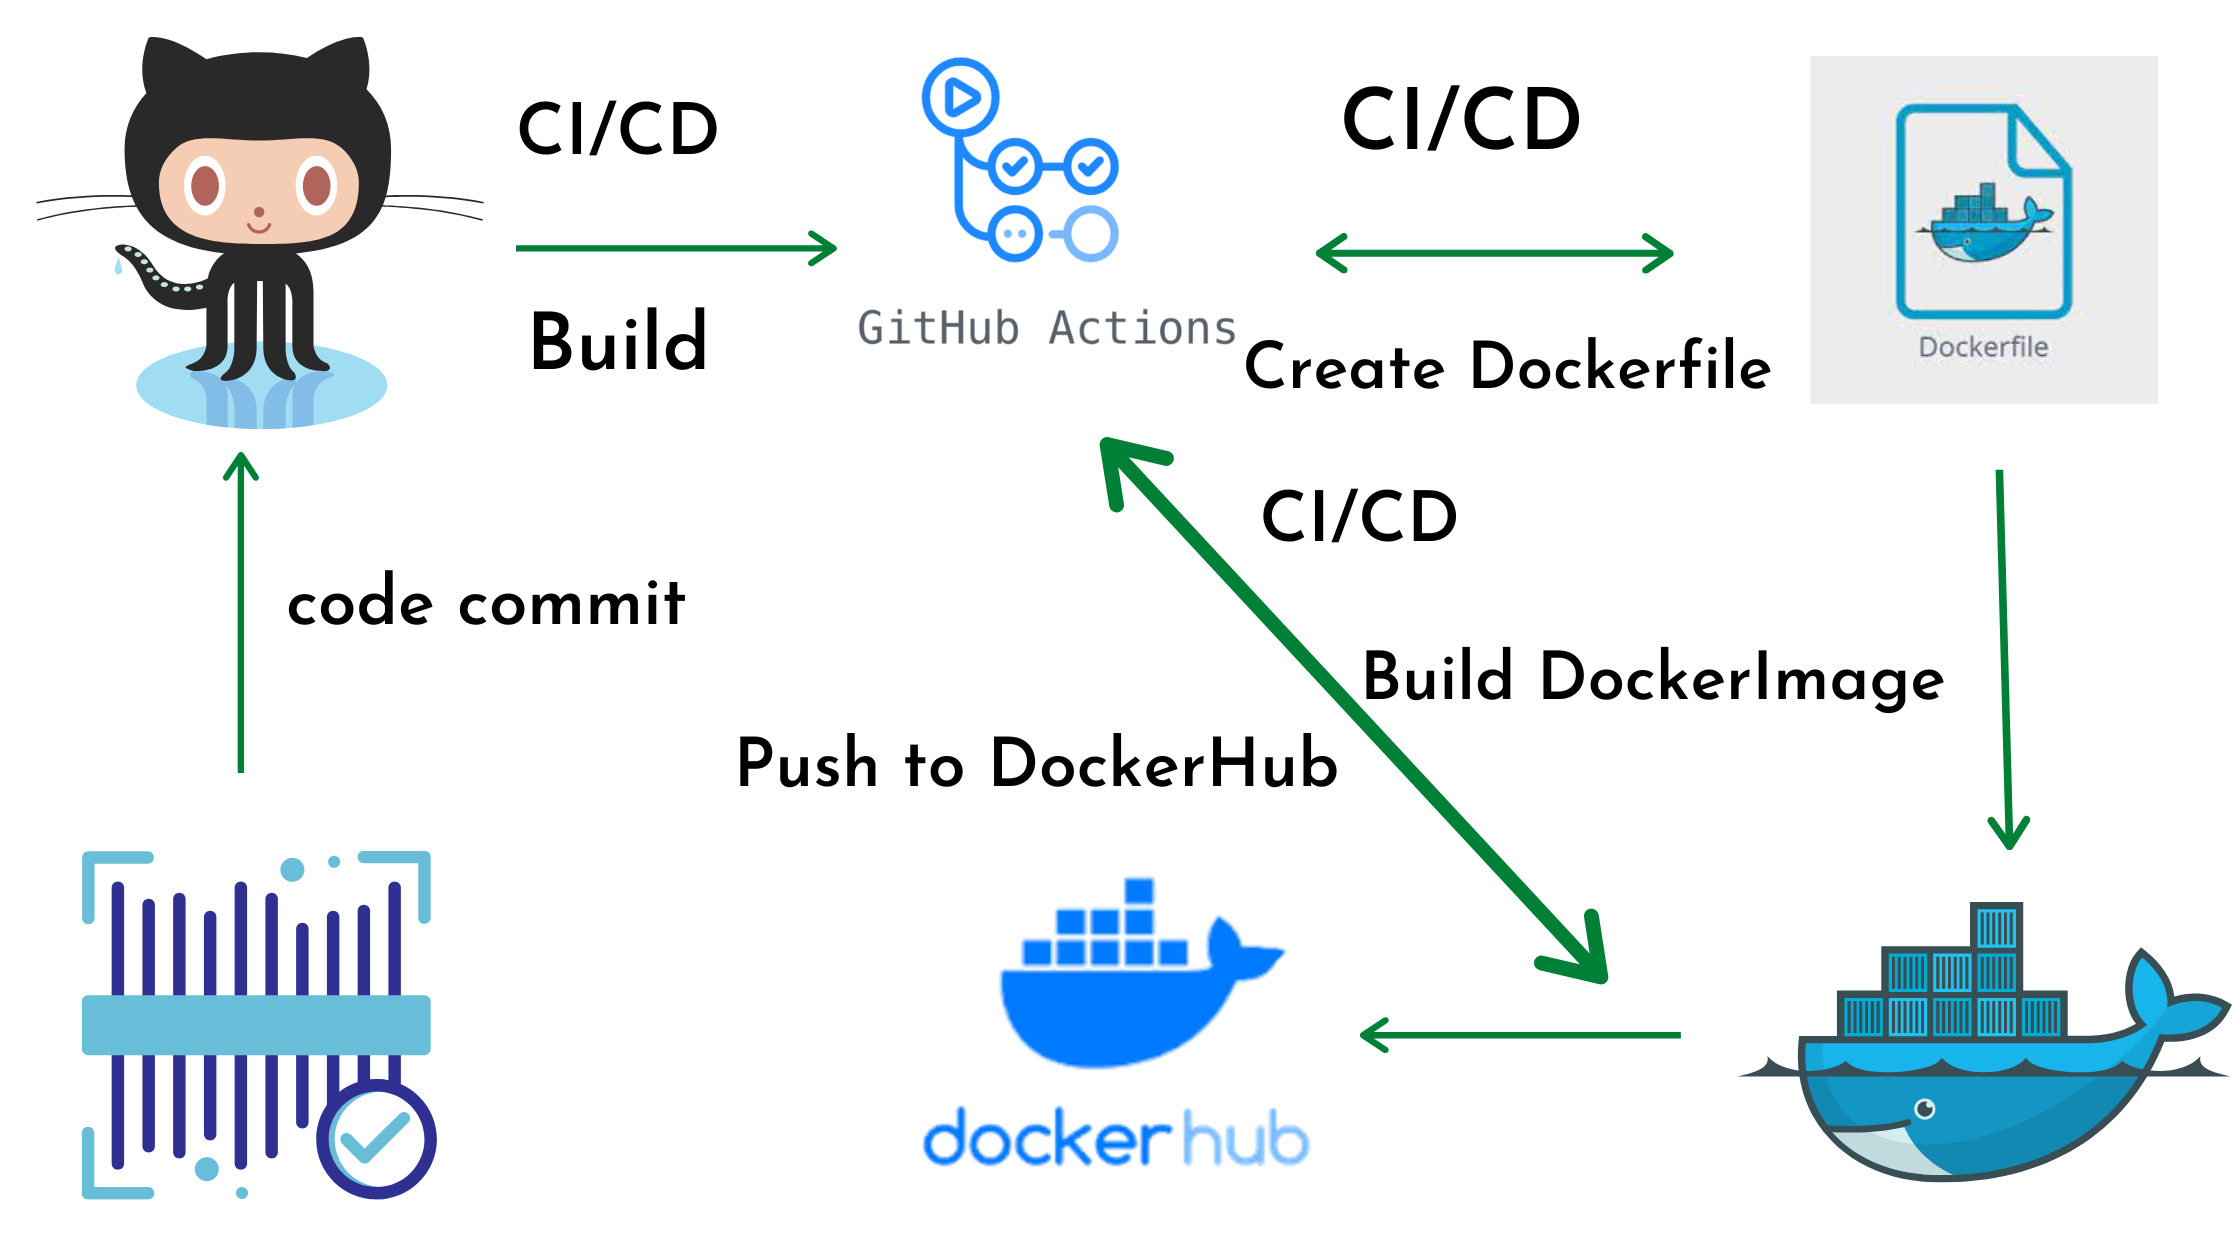
GitHub Actions is a built-in CI/CD (continuous integration and continuous delivery) platform that lets you automate tasks within your software development lifecycle.
In layman’s terms, it automates repetitive tasks you typically do throughout the development process.
What GitHub Actions can do ?
- Automate workflows: Define automated workflows that run in response to specific events in your repository, like a push to a branch or a pull request being merged. These workflows can include building, testing, and deploying your code.
- Improve code quality: Integrate testing tools into your workflows to automatically catch bugs early in the development process.
- Streamline deployments: Automate deployments to production environments, reducing the risk of errors and manual configuration.
- Boost developer productivity: By automating tasks, developers can focus on writing code and fixing bugs rather than repetitive manual work.
- Faster Releases: Streamlines the deployment process, allowing for faster releases.
- Collaboration: Enables collaboration by providing clear visibility into the build and deployment process.
GitHub Actions Components

- Workflows: The core building block. A workflow is a YAML file that defines a sequence of automated tasks. You can create multiple workflows for different purposes.
- Events: These are the triggers that initiate a workflow. Common events include pushes, pull requests, and scheduled actions.
- Jobs: Each workflow can have one or more jobs. A job is a specific set of steps to be executed, often on a virtual machine (runner).
- Steps: These are the individual commands that make up a job. They can be anything from building your code to running tests or deploying your application.
- Runners: These are the virtual machines (VMs) where your jobs are executed. GitHub provides runners, or you can self-host your own.
What is Workflow in GitHub Actions?
- A workflow is a YAML file stored in the .github/workflows directory of your repository.
- It defines a sequence of automated tasks to be executed in a specific order.
- You can have multiple workflows in a repository, each handling different scenarios.
Components of Workflow in GitHub Actions?
Events:
These are the triggers that initiate the workflow. Common events include:
- Push to a branch
- Pull request creation or merge
- Issue or comment creation
- Scheduled execution (e.g., daily at a specific time)
Jobs:
- A workflow can have one or more jobs. Each job represents a specific set of tasks to be completed, often on a virtual machine (runner)
Steps:
Each job consists of a series of steps, which are the individual commands that make up the job. Steps can include:
- Checking out your code from the repository
- Installing dependencies
- Building your code
- Running tests
- Deploying your application
Benefits of Workflow in GitHub Actions?
- Automation: Automates repetitive tasks, saving development time.
- Customization: You can tailor workflows to your specific needs.
- Flexibility: Different workflows can handle different events and processes.
- Visibility: Provides clear visibility into the automated tasks.
How to Create Workflow in GitHub Actions?
- Define the workflow YAML file with events, jobs, and steps.
- Use the GitHub Actions syntax for specifying commands and configurations.
- There are pre-built workflows available for various languages and tools that you can customize as a starting point.
1. Setting Up the Directory:
- Navigate to your GitHub repository.
If it doesn’t exist yet, create a directory named .github/workflows within your repository. This is where GitHub Actions will look for workflow files.
2. Creating the Workflow File:
- Inside the .github/workflows directory, create a new YAML file. You can name it anything descriptive (e.g., build-and-test.yml).
- This YAML file will define your workflow configuration.
3. Defining the Workflow:
- The YAML syntax specifies the workflow structure. Here’s a basic template:
name: <Your workflow name>

on: <Event triggers>

jobs:
  <Job name 1>:
    runs-on: <Runner operating system>
    steps:
      - uses: actions/checkout@v3 # Checkout code from repository
      - name: Install dependencies  # Step name and command description
        run: npm install           # Command to install dependencies

  <Job name 2> (Optional):  # You can add multiple jobs
    runs-on: <Runner operating system>
    steps:
      - ...  # Define steps for the second job
Explanation of the workflow Template:
<Your workflow name>: Replace this with a descriptive name for your workflow.
<Event triggers>: Specify the events that will trigger the workflow execution. This could be push (to a specific branch), pull_request (actions), or a schedule (e.g., daily). Refer to the Actions documentation for all event options https://github.com/marketplace/actions/google-docs-to-github.
<Job name>: Define names for each job within the workflow.
<Runner operating system>: Specify the operating system (e.g., ubuntu-latest, windows-latest) for the virtual machine (runner) that will execute the job.
<steps>: This section lists the individual commands to be executed for each job. You can use pre-built actions from the marketplace or define your own custom commands.
4. Adding Steps to the Workflow:
Under the steps section for each job, define the commands you want to run.
You can use pre-built actions by specifying the action name and version (e.g., uses: actions/checkout@v3).
Refer to the marketplace for available actions on GitHub Actions official page.
Alternatively, you can define your own shell commands directly (e.g., run: npm install).
5. Committing and Pushing the Workflow:
Once you’ve defined your workflow in the YAML file, commit the changes to your repository.
Push the changes to your remote repository on GitHub.
Example:
name: Build and Test

on: push # Triggered on push to any branch

jobs:
  build-and-test:
    runs-on: ubuntu-latest

    steps:
      - uses: actions/checkout@v3 # Checkout code from repository
      - name: Install dependencies
        run: npm install # Replace with your dependency installation command
      - name: Run tests
        run: npm test # Replace with your test command
6. Run GitHub Actions workflow
On GitHub.com, navigate to the main page of the repository.
under your repository name, click Actions.
In the left sidebar, click the name of the workflow you want to run.
Above the list of workflow runs, click the Run workflow button.
Select the Branch dropdown menu and click a branch to run the workflow on.
If the workflow requires input, fill in the fields.
Click Run workflow.
Conclusion:
In this article we have covered GitHub Actions Tutorial with Practicals.
Related Articles: