Deploying to AWS ECS using GitHub Actions

Deploying to AWS ECS using GitHub Actions

In this article we are going to cover How to deploy on AWS ECS using GitHub Actions. Prerequisites: Step #1:Create an ECR Repository in AWS Create EC2 Instance, Install AWS CLI and Configure IAM user using AWS CLI, Please follow below article for same AWS CLI Installation on Linux Servers Use the AWS CLI or Management Console to create an ECR repository for storing your Docker images. Syntax: Example: Output: ECR repo got created in AWS Step #2:Create an ECS Cluster and Task Definition: Define an ECS cluster in your AWS account where your containerized application will run. Create a task definition that specifies the container image, CPU, memory, and other configuration details for your application. You can store the task definition as a JSON file in your Git repository. Step #3:Configure GitHub Secrets Create secrets in your GitHub repository named AWS_ACCESS_KEY_ID and AWS_SECRET_ACCESS_KEY to store your AWS access credentials (ensure least privilege). Step #4:Create a GitHub Workflow Deploy to AWS ECS In your GitHub repository, create a .github/workflows directory and a YAML file defining your workflow. Here’s a basic structure: Explanation: Conclusion: In this article we have covered How to deploy on AWS ECS using GitHub Actions. Related Articles: Deploy to Kubernetes using GitHub Actions Reference: Deploying to Amazon Elastic Container Service github actions official page

Build Java Project with Maven using GitHub Actions

Build Java Project with Maven using GitHub Actions

In this article we are going to cover How to Build Java Project with Maven using GitHub Actions Prerequisites: Step #1:Create a .github/workflows directory If it doesn’t exist, create a new directory named .github/workflows in the root of your GitHub repository. This directory will store your workflow YAML files. Step #2:Create a workflow YAML file Create a new file named maven.yml (or any desired name) inside the .github/workflows directory. This file will define the workflow steps. Step #3:Add the workflow code Paste the following code into the maven.yml file, replacing placeholders with your project’s details: Explanation of above workflow Step #4:Commit and push changes Step #5:Running the Workflow in GitHub Actions Once you push the changes, GitHub Actions will automatically trigger the workflow and build your project using Maven. You can view the build status and logs in the GitHub Actions tab under your repository. Conclusion: In this article we have covered How to Build Java Project with Maven using GitHub Actions. Related Articles: Push Docker Image to DockerHub Using GitHub Actions Reference: Building and testing Java with Maven github action official page

Push Docker Image to DockerHub Using GitHub Actions

Push Docker Image to DockerHub Using GitHub Actions

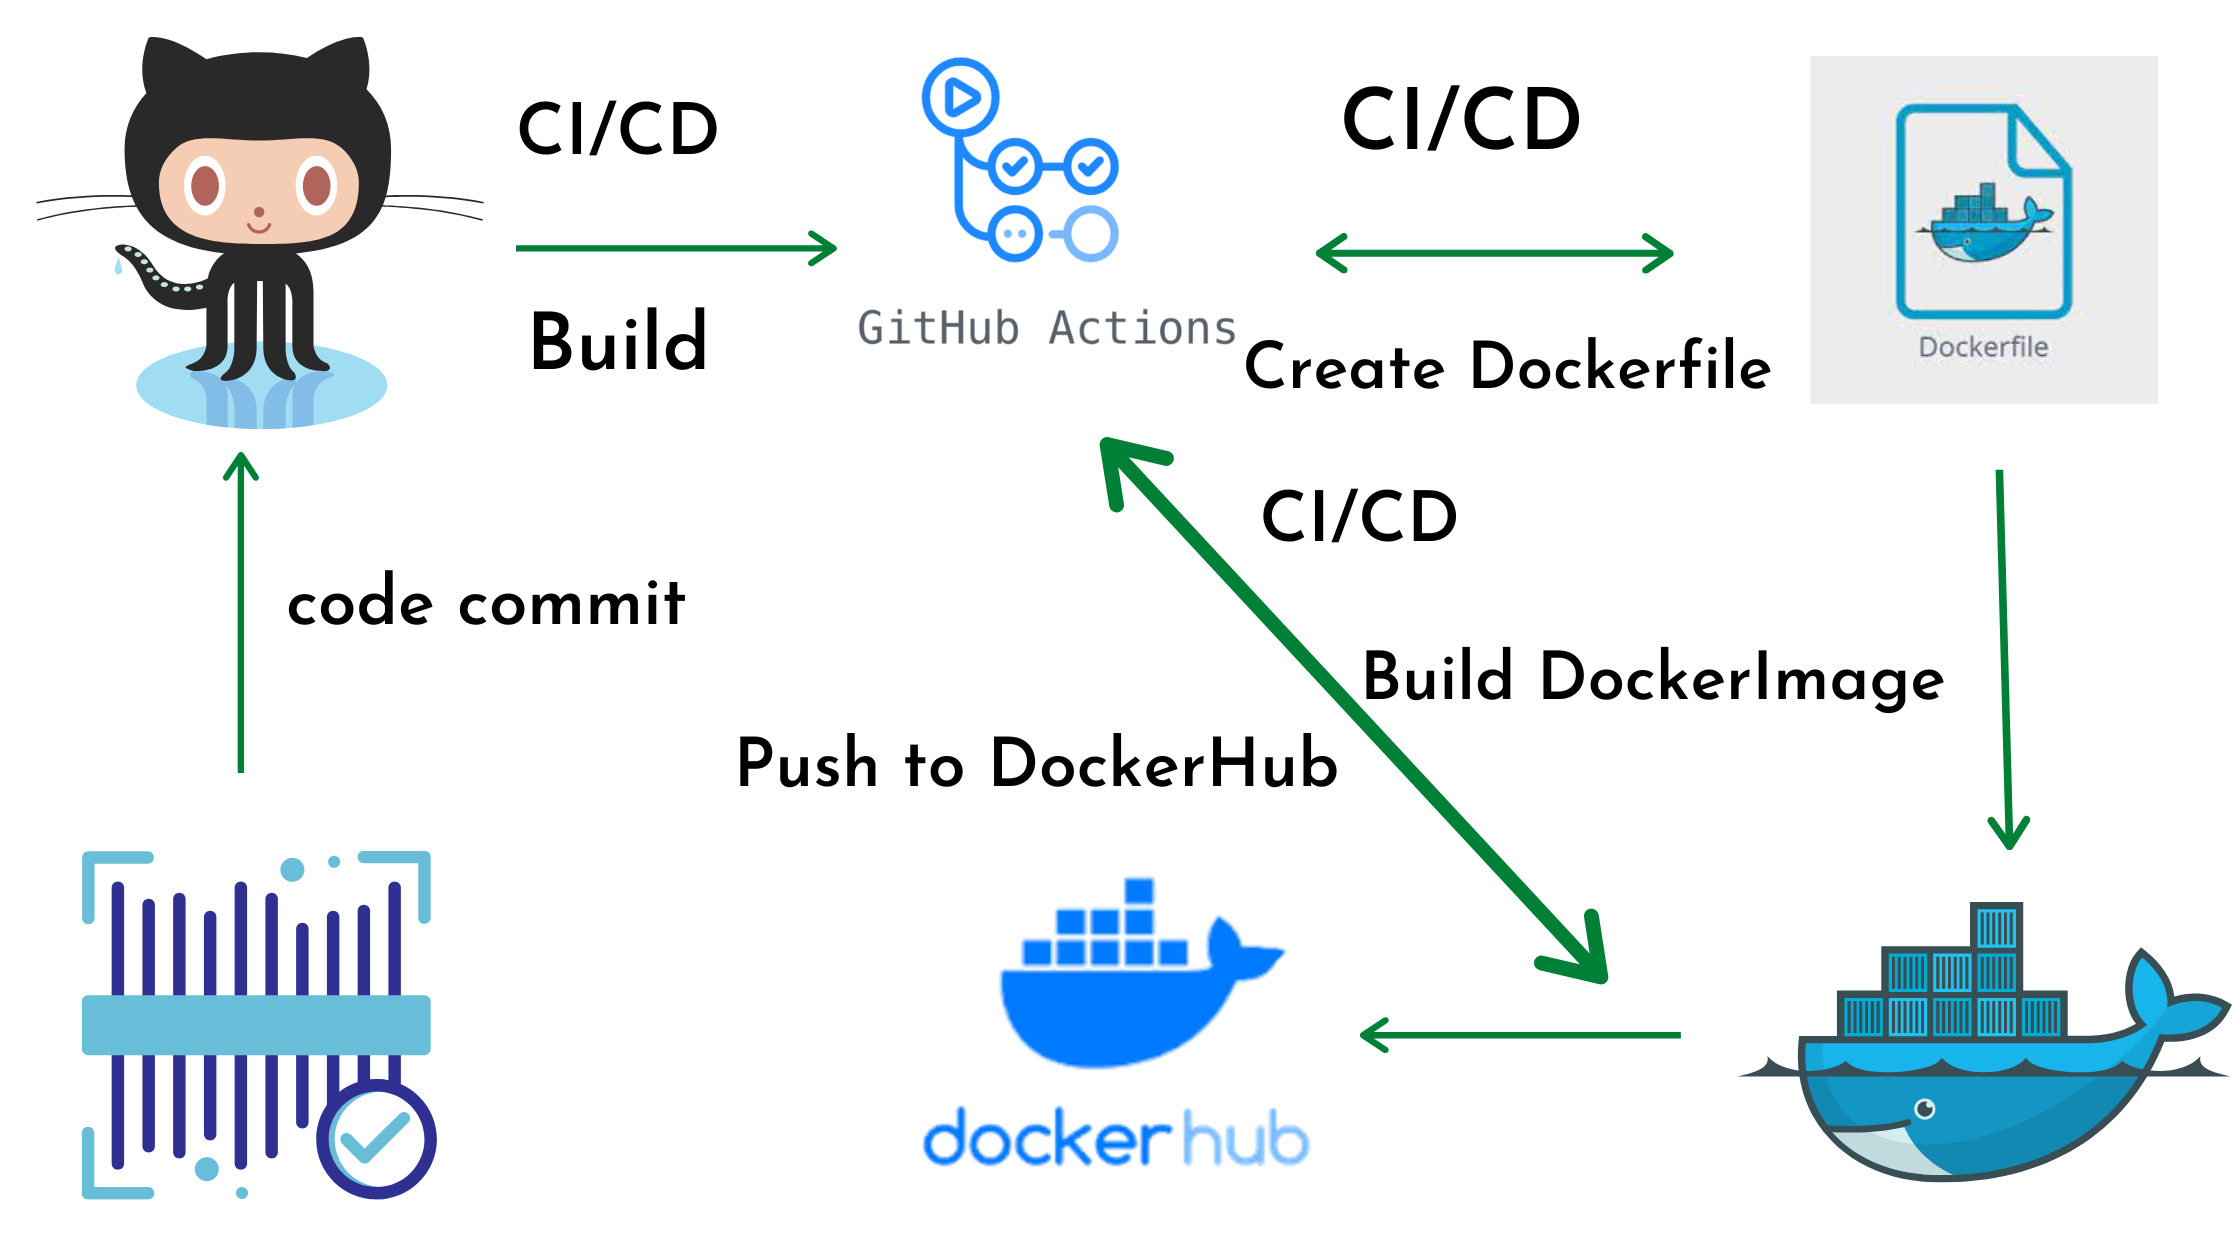
In this article we are going to learn Create Dockerfile for Node.js app, Create server.js and package.json file | How to build and push Docker image to DockerHub using GitHub Actions. Prerequisite: First of all you need to create new repository on GitHub or you can use your old repository also Step #1:Create Docker file for Node.js App You can use our existing GitHub Repository of push Docker image to DockerHub using GitHub Actions. We have to create a Dockerfile for our application using below code. Step #2:Create a package.json file Lets create a new package.json file using below code Step #3:GitHub Actions workflow push Docker image to DockerHub using GitHub Actions Now configure the GitHub Actions. For the Image building and pushing it to DockerHub and here we are going to use a great tool from GitHub called GitHub Actions. Now let’s create your workflow using below file: Let’s understand our workflow first Steps: Steps represent a sequence of tasks that will be executed as part of the job steps Job: Name: Check out code It job simply checks out our GitHub repository for “Dockerfile” to build the docker image Job: Name: Configure DockerHub credentials In this job we need to configure AWS login Credentials. For accessing the DockerHub we need to define a custom Role in later steps. Job:Name: Build, tag, and push image to DockerHub In this step we are going to build the Docker Image by copying using the Code in our Repository, tagging the Image with Version and pushing Image to DockerHub Step #4:Create repository in DockerHub Firstly go to your DockerHub account, input the name, select visibility and click on create. Step #5:Add DockerHub Repo Secrets on GitHub Now to access DockerHub, so here we need to add DockerHub Username for DOCKERHUB_USERNAME and password DOCKERHUB_PASSWORD as mentioned in GitHub Actions workflow. So go to the settings and create secrets and set them as Environment Variables as shown below. Step #6:Push Docker Image to DockerHub Using GitHub Action Now let’s commit and push our code into our repository. Now our Job got succeeded. we have have completed Now you can open the DockerHub repository and check for the final image with the latest tag inside it. Conclusion: We have covered Create Dockerfile for Node.js app, Create server.ja and package.json file | How to build and push Docker image to DockerHub using GitHub Actions. Related Articles: GitHub Actions Tutorial with Practicals Reference: Publishing Docker images using GitHub Actions official page

GitHub Actions Tutorial with Practicals

GitHub Actions Tutorial with Practicals

In this article we are going to cover GitHub Actions Tutorial with Practicals. What is GitHub Actions ? GitHub Actions is a built-in CI/CD (continuous integration and continuous delivery) platform that lets you automate tasks within your software development lifecycle.  In layman’s terms, it automates repetitive tasks you typically do throughout the development process. What GitHub Actions can do ? GitHub Actions Components What is Workflow in GitHub Actions? Components of Workflow in GitHub Actions? Events: These are the triggers that initiate the workflow. Common events include: Jobs: Steps: Each job consists of a series of steps, which are the individual commands that make up the job. Steps can include: Benefits of Workflow in GitHub Actions? How to Create Workflow in GitHub Actions? 1. Setting Up the Directory: If it doesn’t exist yet, create a directory named .github/workflows within your repository. This is where GitHub Actions will look for workflow files. 2. Creating the Workflow File: 3. Defining the Workflow: Explanation of the workflow Template:  <Your workflow name>: Replace this with a descriptive name for your workflow. <Event triggers>: Specify the events that will trigger the workflow execution. This could be push (to a specific branch), pull_request (actions), or a schedule (e.g., daily). Refer to the Actions documentation for all event options https://github.com/marketplace/actions/google-docs-to-github. <Job name>: Define names for each job within the workflow. <Runner operating system>: Specify the operating system (e.g., ubuntu-latest, windows-latest) for the virtual machine (runner) that will execute the job. <steps>: This section lists the individual commands to be executed for each job. You can use pre-built actions from the marketplace or define your own custom commands. 4. Adding Steps to the Workflow: Under the steps section for each job, define the commands you want to run. You can use pre-built actions by specifying the action name and version (e.g., uses: actions/checkout@v3). Refer to the marketplace for available actions on GitHub Actions official page. Alternatively, you can define your own shell commands directly (e.g., run: npm install). 5. Committing and Pushing the Workflow:     Once you’ve defined your workflow in the YAML file, commit the changes to your repository.     Push the changes to your remote repository on GitHub. Example: 6. Run GitHub Actions workflow On GitHub.com, navigate to the main page of the repository. under your repository name, click Actions. In the left sidebar, click the name of the workflow you want to run. Above the list of workflow runs, click the Run workflow button. Select the Branch dropdown menu and click a branch to run the workflow on. If the workflow requires input, fill in the fields. Click Run workflow. Conclusion: In this article we have covered GitHub Actions Tutorial with Practicals. Related Articles: What is Git and GitHub?

Installing MySQL 5.7 on Ubuntu 20.04: A Step-by-Step Guide

If you’re setting up a database for your application or exploring the world of relational database management systems, MySQL 5.7 is a robust choice. In this step-by-step guide, we’ll walk you through the process of installing MySQL 5.7 on an Ubuntu 20.04 system, explaining each command along the way. Step 1: Update Package List Before diving into the installation, let’s ensure our package list is up-to-date. Open a terminal and run the following command: This command fetches the latest information about available packages from the repositories. Step 2: Install MySQL Server Now, let’s install the MySQL server package. Execute the following command: This command installs the MySQL server on your system. Step 3: Secure MySQL Installation MySQL comes with a security script to help us secure the installation. Run the script with the following command: This script prompts you to set a root password, remove anonymous users, disallow root login remotely, remove the test database, and reload privilege tables. Step 4: Check MySQL Service Status Ensure that the MySQL service is running by executing: This command provides information about the MySQL service, including whether it’s active or inactive. Step 5: Access MySQL Shell Let’s access the MySQL shell to interact directly with the database: This command opens the MySQL shell for the root user. You’ll be prompted to enter the root password. Step 6: (Optional) Install MySQL Client If you need to connect to MySQL from another machine or run commands remotely, you can install the MySQL client: This step is optional and is particularly useful if you plan to manage your MySQL server from a different location. Congratulations! You’ve successfully installed MySQL 5.7 on your Ubuntu 20.04 system. Feel free to explore the capabilities of MySQL for your database needs. Remember that software versions and installation steps may change, so always refer to the official documentation for the most accurate and up-to-date information. Happy coding!

How to Install Git on Windows: A Step-by-Step Guide

If you’re venturing into the world of software development, you’ll soon encounter Git, an essential tool for version control. Git helps you track changes in your source code, collaborate with others, and revert to previous versions of your project. In this blog post, we’ll walk you through the steps to install Git on a Windows machine. What is Git? Before diving into the installation process, let’s briefly understand what Git is. Git is a Distributed Version Control System (DVCS) that allows multiple developers to work on a single project without stepping on each other’s toes. It tracks changes, handles merging, and maintains the history of your project efficiently. Step 1: Download the Git Installer First things first, you need to download the Git installer: Step 2: Run the Installer Once the download is complete: Step 3: Installation Wizard The Git Setup Wizard will guide you through several steps: After making your choices, click ‘Next’ and proceed until you can click ‘Install’. Step 4: Completing the Installation After the installation process finishes, click ‘Finish’. Git is now installed on your system. Step 5: Verify the Installation To ensure Git is installed correctly: Step 6: Configuring Git (Optional) It’s a good practice to configure your Git environment: This configuration is important as it identifies you as the author of your commits. Conclusion Congratulations! You have successfully installed Git on your Windows machine. You’re now ready to embark on your journey of software development with one of the most powerful version control tools at your disposal. Stay tuned for more blogs where we’ll delve into how to use Git, including creating repositories, basic commands, and collaboration techniques. Happy coding!

Need Help?
Call Now