Creating an EKS cluster in AWS is a great way to run Kubernetes workloads on AWS without the hassle of managing the Kubernetes control plane. EKS means Elastic Kubernetes Service. The Kubernetes control plane plays a crucial role in a Kubernetes deployment as it is responsible for how Kubernetes communicates with your cluster — starting and stopping new containers, scheduling containers, performing health checks, and many more management tasks. This step-by-step guide will help you set up an EKS cluster:

Prerequisites:
- AWS account.
- Install and configure the AWS CLI.
- Install kubectl for Kubernetes command-line access.
- Install eksctl, a simple CLI tool for creating clusters on EKS.
- Ensure you have an IAM role for EKS service.
Creating EKS Cluster in AWS:
Open AWS Management Console, navigate to EKS and select “Create EKS Cluster”.
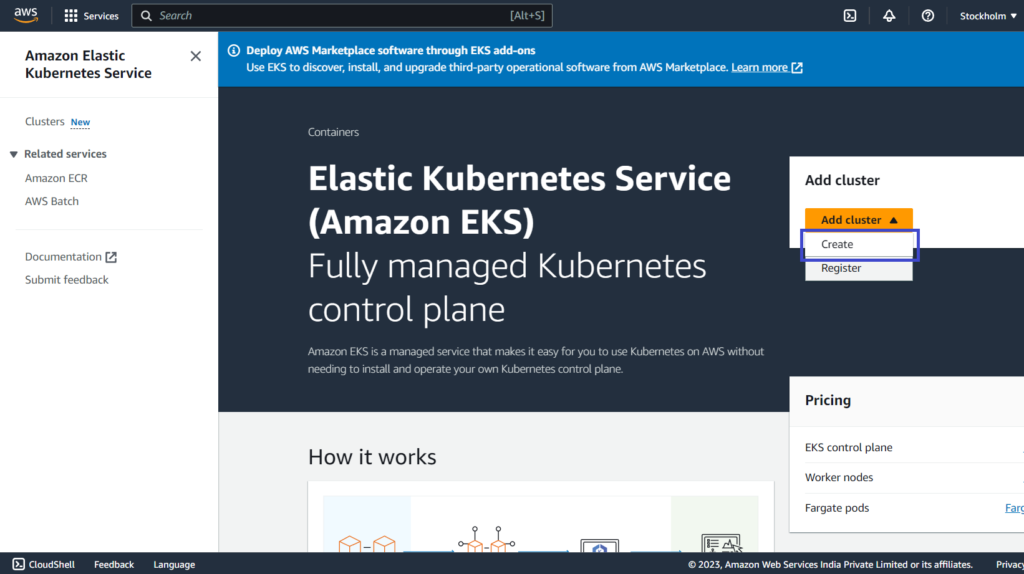
You have to go through 6 Steps to create EKS Cluster
Step 1: Configure Cluster:
- We have to enter a unique name for this cluster.
- We have to select the Kubernetes version for this cluster.
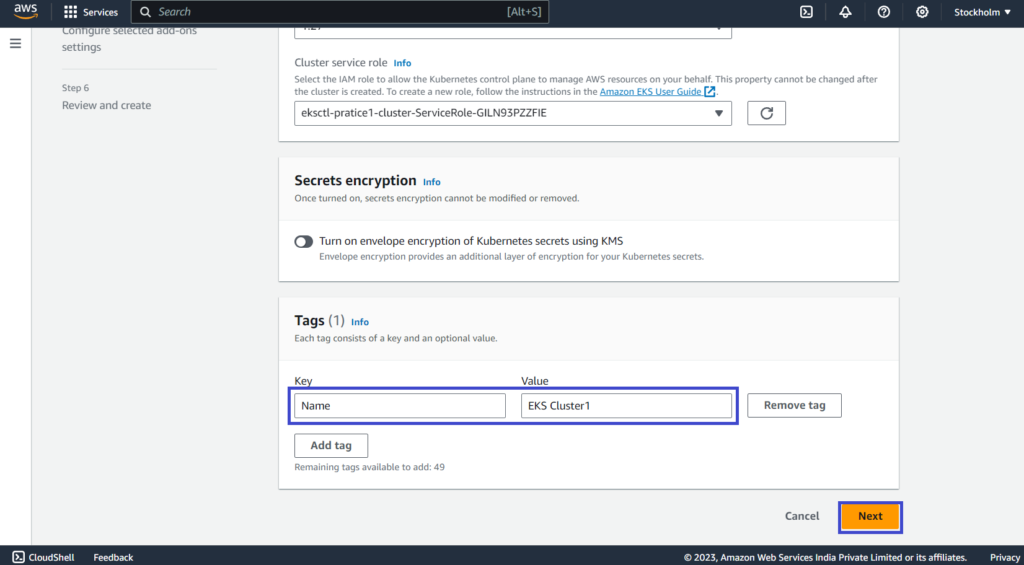
- We have to Select the IAM role to allow the Kubernetes control plane to manage AWS resources on your behalf.
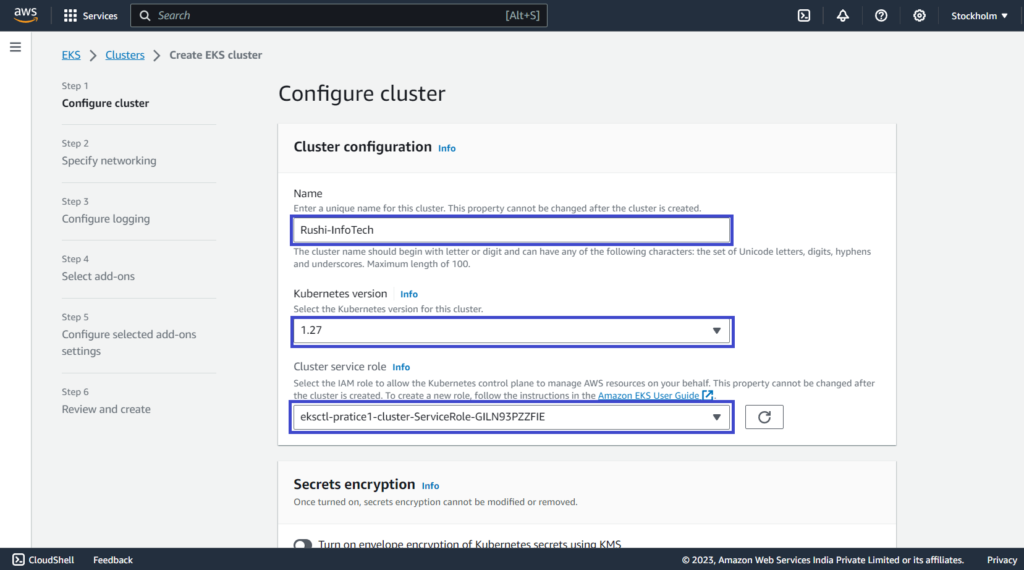
- We can define a set of tags for our Amazon EKS clusters to help us track each cluster’s owner and stack level. We gave Name as EKS Cluster1.
- Then click Next to proceed.
Step 2: Specify networking
- We have to select a VPC to use for your EKS cluster resources. We have selected Default VPC here.
- We have to choose the subnets in your VPC where the control plane may place elastic network interfaces (ENIs) to facilitate communication with your cluster. We have selected 2 subnets from 3 available subnets.
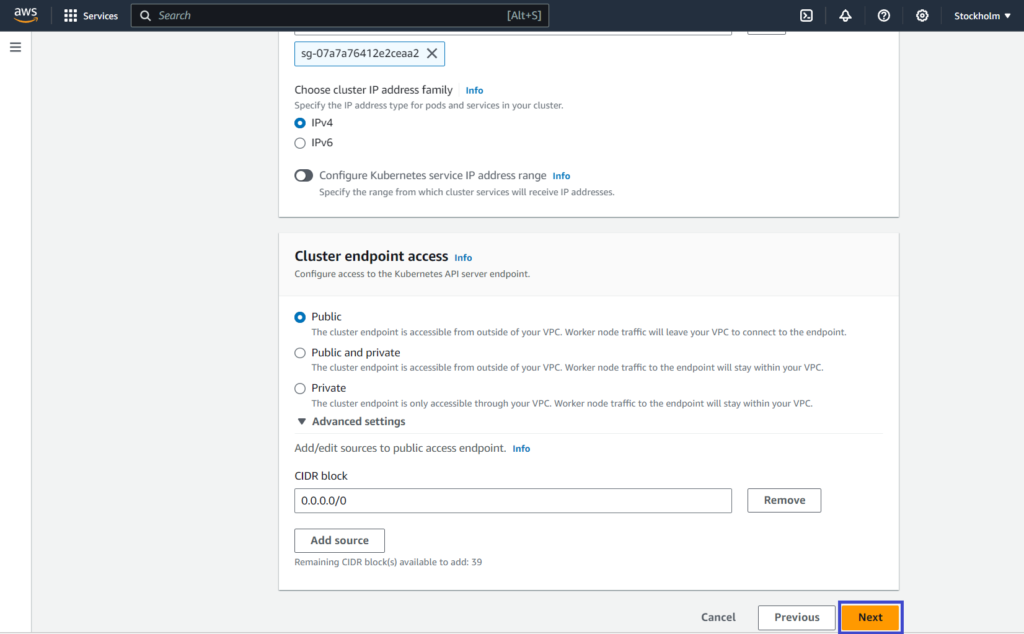
- We have to choose the security groups to apply to the EKS-managed Elastic Network Interfaces that are created in your worker node subnets. We have selected existing Security Groups here.

- We have to configure access to the Kubernetes API server endpoint. We have selected Public in this case.
- We can Add/edit sources to public access endpoint.
- Then click Next to proceed.
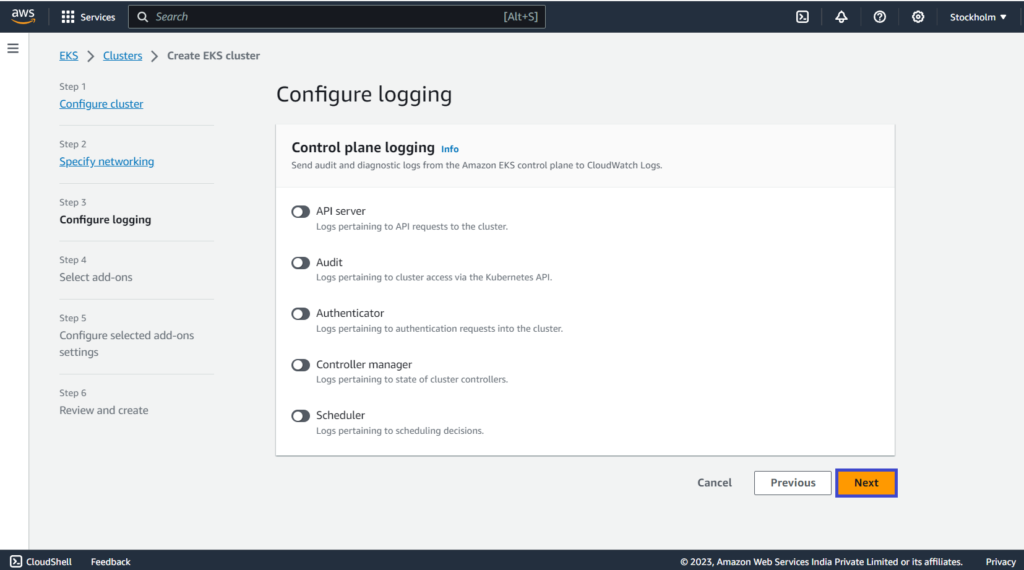
Step 3: Configure logging
- We can send audit and diagnostic logs from the Amazon EKS control plane to CloudWatch Logs.
- We have options like API server, Audit, Authenticator, Controller manager & Scheduler.
- Based on our requirements, we can on/off these options.
- Then click Next to proceed.
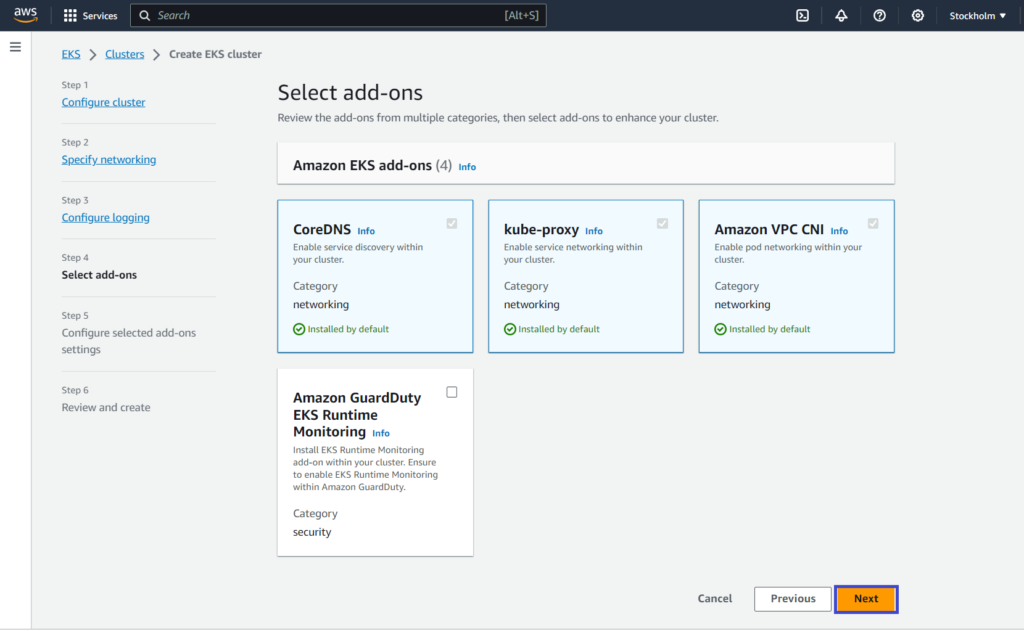
Step 4: Select add-ons
- We can review the add-ons from multiple categories, then select add-ons to enhance your cluster.
- Then click Next to proceed.
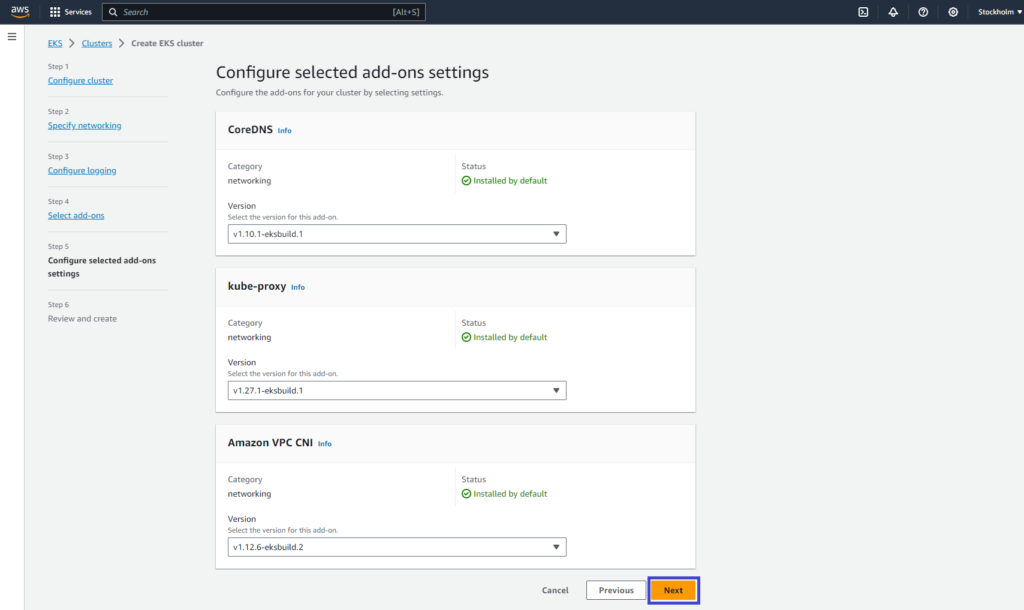
Step 5: Configure selected add-ons settings
- We can configure the add-ons for our cluster by selecting settings like CoreDNS, kube-proxy & Amazon VPC CNI. We are going with default options.
- Then click Next to proceed.
Step 6: Review and create
- We can review all the options we have selected if needed we can make changes.
- Then click Create to proceed.

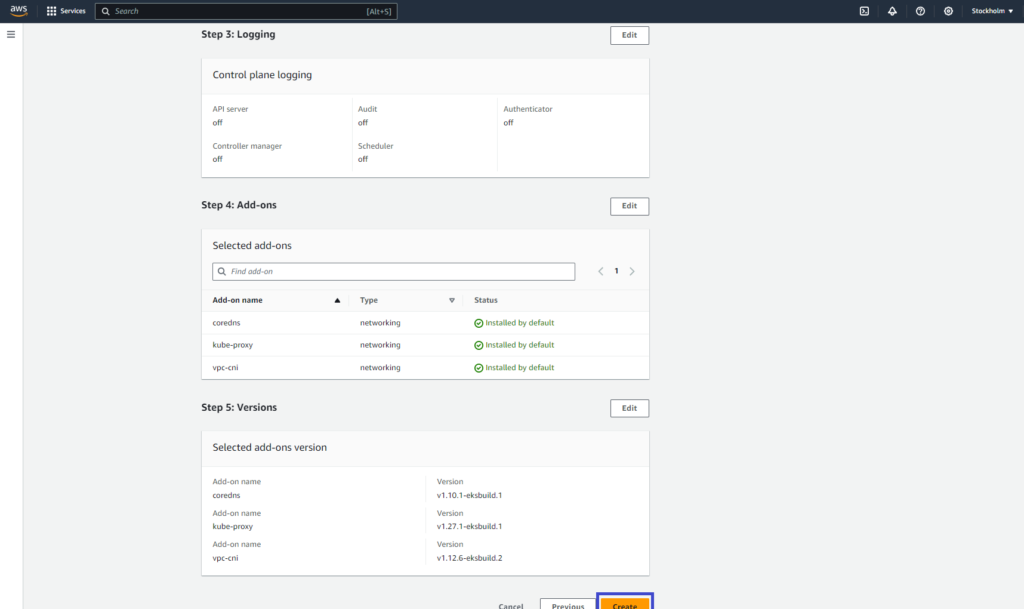
- It takes approximately 10 minutes to create cluster.


- We can browse options like Overview, Resources, Compute, Networking, Add-ons, Authentication, Logging, Update history & Tags after Cluster creation.
Creating EC2 instance & Connecting EKS cluster:
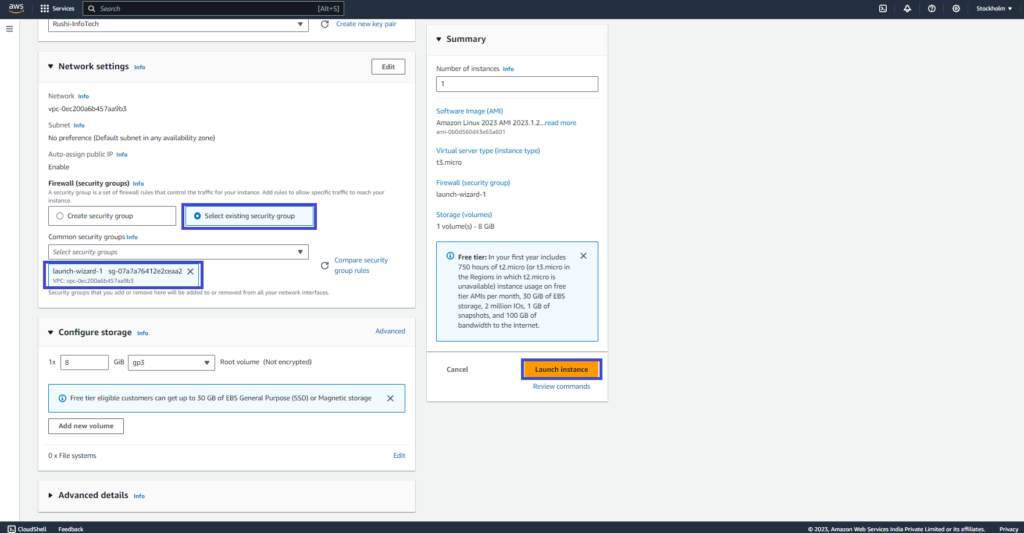
- We have to create an Amazon Linux EC2 instance to connect with EKS cluster.

- Create an Amazon Linux EC2 instance with default options and Select existing security group in Network Settings which we have selected while EKS cluster creation, then click Launch instance.
- We will launch EC2 instance using MobaXterm.
- We have to install & update Kubectl by using the below commands:
[ec2-user@Rushi-InfoTech ~]$ curl -O https://s3.us-west-2.amazonaws.com/amazon-eks/1.27.4/2023-08-16/bin/linux/amd64/kubectl[ec2-user@Rushi-InfoTech ~]$ curl -O https://s3.us-west-2.amazonaws.com/amazon-eks/1.27.5/2023-09-14/bin/linux/amd64/kubectl.sha256[ec2-user@Rushi-InfoTech ~]$ sha256sum -c kubectl.sha256[ec2-user@Rushi-InfoTech ~]$ openssl sha1 -sha256 kubectl[ec2-user@Rushi-InfoTech ~]$ chmod +x ./kubectl[ec2-user@Rushi-InfoTech ~]$ mkdir -p $HOME/bin && cp ./kubectl $HOME/bin/kubectl && export PATH=$HOME/bin:$PATH[ec2-user@Rushi-InfoTech ~]$ echo 'export PATH=$HOME/bin:$PATH' >> ~/.bashrc
- We have to Create or update a Kubeconfig file for an Amazon EKS cluster by using below command:
[ec2-user@Rushi-InfoTech ~]$ aws eks update-kubeconfig --region eu-north-1 --name Rushi-InfoTech
Adding Worker Nodes:
- Select the EKS Cluster, go to Compute and under Node groups click Add node group.

- Give the name for the Node group.

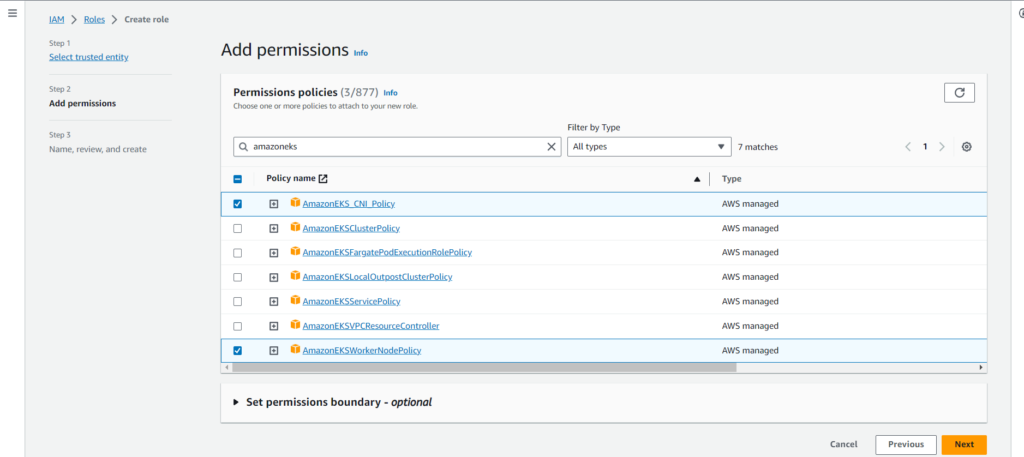
- Create Node IAM role with these permissions and select that Node IAM role.
1. AmazonEKSWorkerNodePolicy
2.AmazonEC2ContainerRegistryReadOnly
3.AmazonEKS_CNI_Policy

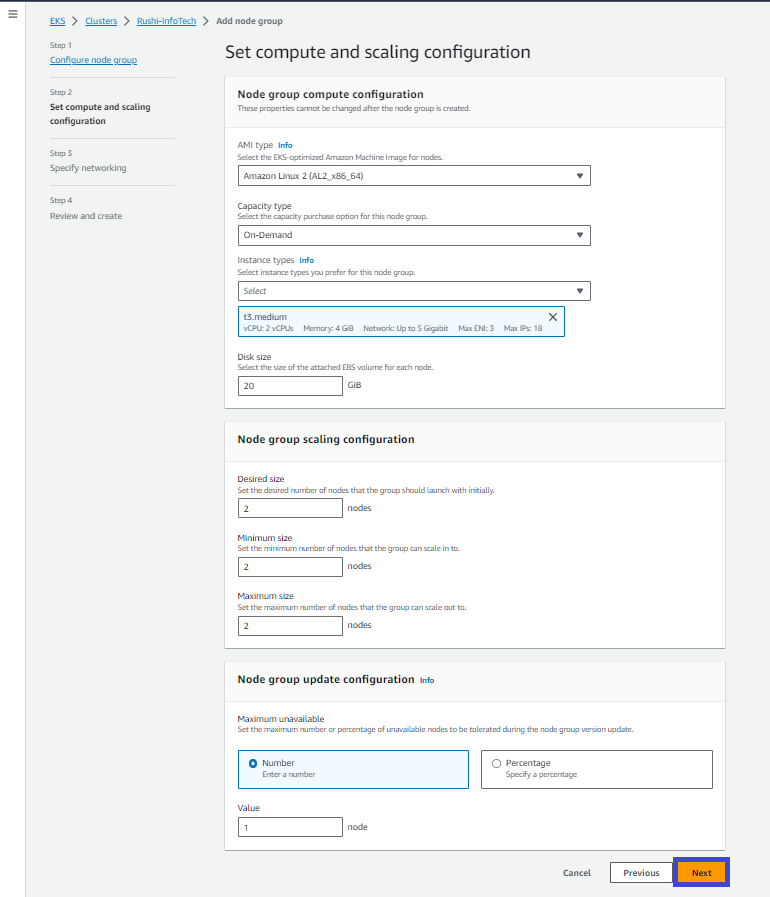
- We are proceeding with default options in Set compute and scaling configuration.
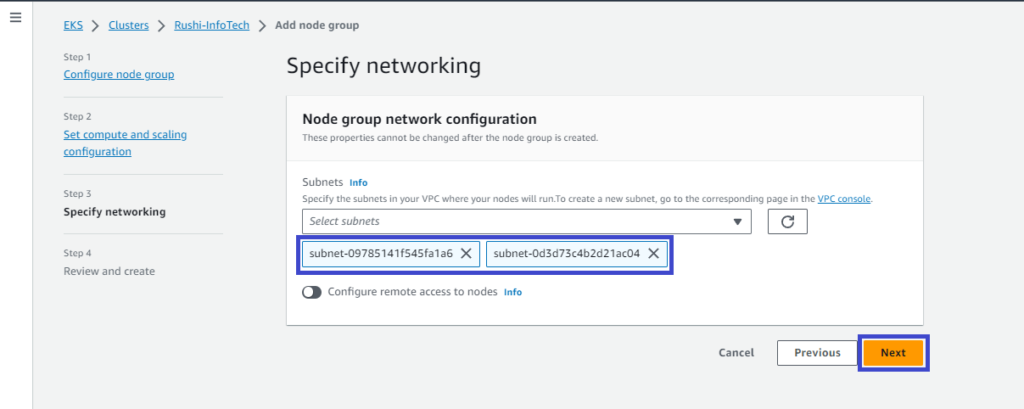
- Select the subnets which we selected while EKS cluster creation.
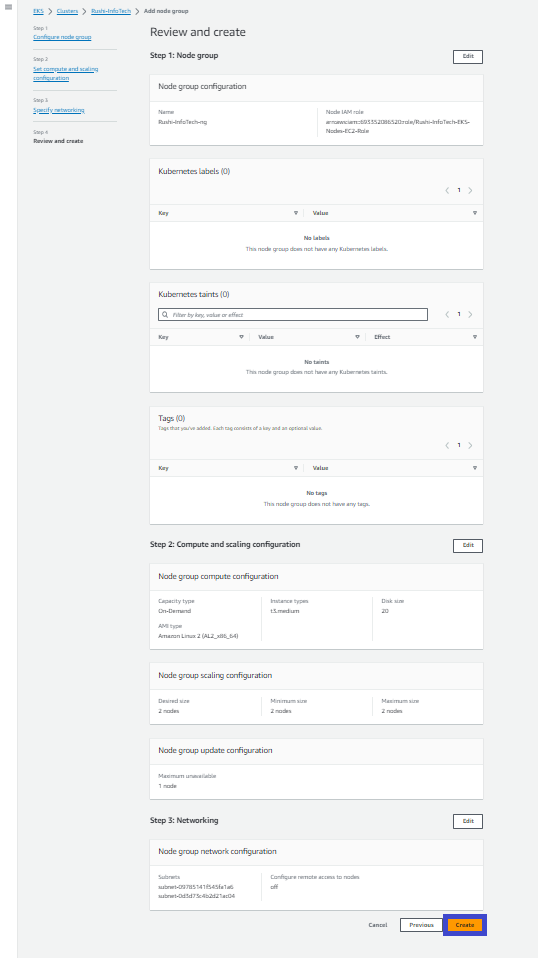
- We can Review and then click Create.
- We can see the Node group is created after 5 minutes approximately.

- Finally, the EKS cluster is created and we can check in EC2 instance with the below command.
[ec2-user@Rushi-InfoTech ~]$ kubectl get nodes
Conclusion:
Hence by using above steps we can create EKS cluster in AWS. The big benefit of EKS cluster, is taking away the operational burden involved in running the Kubernetes control plane. EKS cluster will provision, scale and manage the Kubernetes control plane for you to ensure high availability, security and scalability.
For More Information about EKScluster, please visit official website.
Any queries pls contact us
https://rushiinfotech.in/contact/