In this article we are going to learn Create Dockerfile for Node.js app, Create server.js and package.json file | How to build and push Docker image to DockerHub using GitHub Actions.
Prerequisite:
- DockerHub account
- GitHub Account
- Basic knowledge of GitHub Actions, CI/CD, YAML
First of all you need to create new repository on GitHub or you can use your old repository also
Step #1:Create Docker file for Node.js App
You can use our existing GitHub Repository of push Docker image to DockerHub using GitHub Actions.
We have to create a Dockerfile for our application using below code.
FROM node:14

WORKDIR /usr/src/app

COPY package.json .
RUN npm install
COPY . .

EXPOSE 3000

CMD ["node", "index.js"]
Step #2:Create a package.json file
Lets create a new package.json file using below code
{
    "name": "docker_nodejs_demo",
    "version": "1.0.0",
    "description": "",
    "main": "index.js",
    "scripts": {
      "test": "echo \"Error: no test specified\" && exit 1"
    },
    "keywords": [],
    "author": "",
    "license": "ISC",
    "dependencies": {
      "config": "^3.3.6",
      "express": "^4.17.1"
    }
  }
Step #3:GitHub Actions workflow push Docker image to DockerHub using GitHub Actions
Now configure the GitHub Actions. For the Image building and pushing it to DockerHub and here we are going to use a great tool from GitHub called GitHub Actions.
Now let’s create your workflow using below file:
name: Build and Push Docker image to Docker Hub

on: push
jobs:
  push_to_registry:
    name: Push Docker image to Docker Hub
    runs-on: ubuntu-latest
    steps:
      - name: Check out the repo
        uses: actions/checkout@v3

      - name: Login to Docker Hub
        uses: docker/login-action@f054a8b539a109f9f41c372932f1ae047eff08c9
        with:
          username: ${{ secrets.DOCKERHUB_USERNAME }}
          password: ${{ secrets.DOCKERHUB_PASSWORD }}

      - name: Extract metadata (tags, labels) for Docker
        id: meta
        uses: docker/metadata-action@98669ae865ea3cffbcbaa878cf57c20bbf1c6c38
        with:
          images: my-docker-hub-namespace/my-docker-hub-repository

      - name: Build and push Docker image
        uses: docker/build-push-action@ad44023a93711e3deb337508980b4b5e9bcdc5dc
        with:
          context: .
          push: true
          tags: devopshint/node-app:latest
Let’s understand our workflow first
Steps: Steps represent a sequence of tasks that will be executed as part of the job steps
Job: Name: Check out code
It job simply checks out our GitHub repository for “Dockerfile” to build the docker image
Job: Name: Configure DockerHub credentials
In this job we need to configure AWS login Credentials. For accessing the DockerHub we need to define a custom Role in later steps.
Job:Name: Build, tag, and push image to DockerHub
In this step we are going to build the Docker Image by copying using the Code in our Repository, tagging the Image with Version and pushing Image to DockerHub
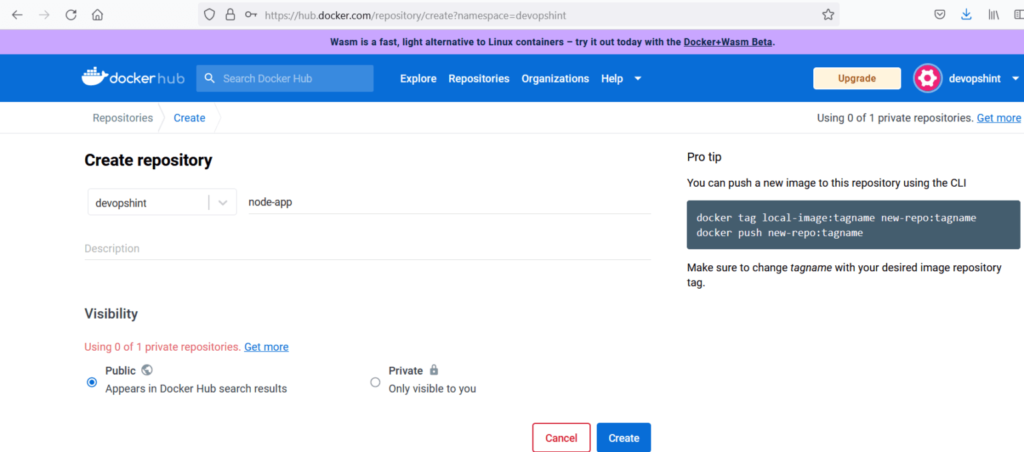
Step #4:Create repository in DockerHub
Firstly go to your DockerHub account, input the name, select visibility and click on create.
Step #5:Add DockerHub Repo Secrets on GitHub
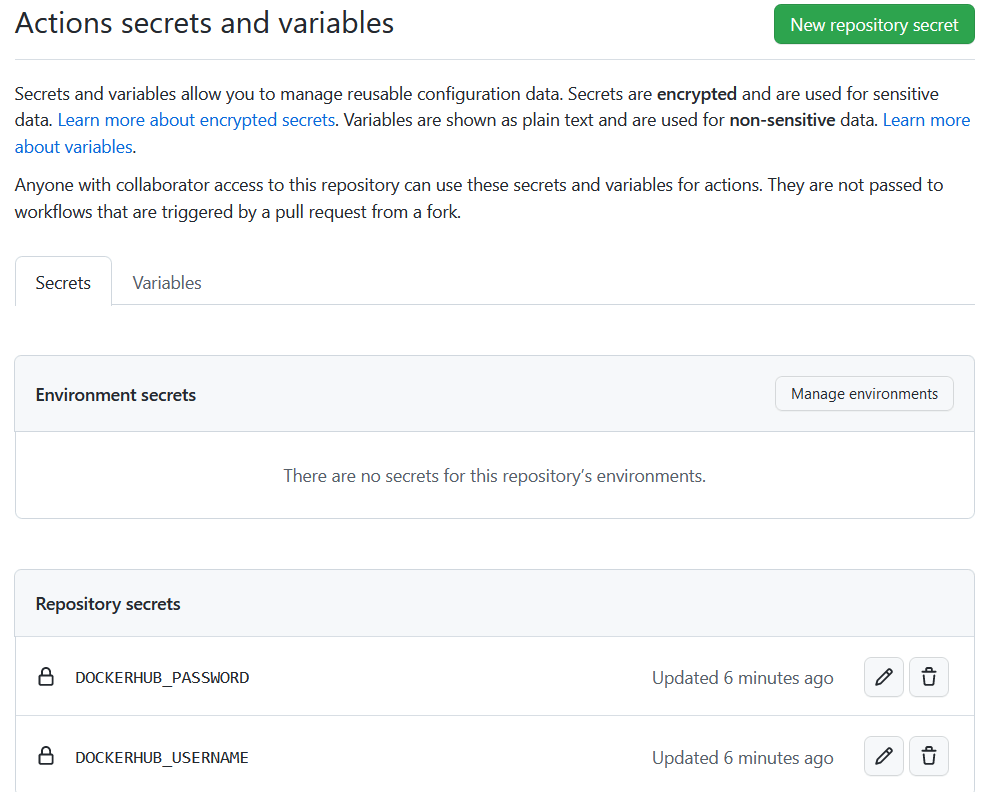
Now to access DockerHub, so here we need to add DockerHub Username for DOCKERHUB_USERNAME and password DOCKERHUB_PASSWORD as mentioned in GitHub Actions workflow.
So go to the settings and create secrets and set them as Environment Variables as shown below.
Step #6:Push Docker Image to DockerHub Using GitHub Action
Now let’s commit and push our code into our repository.
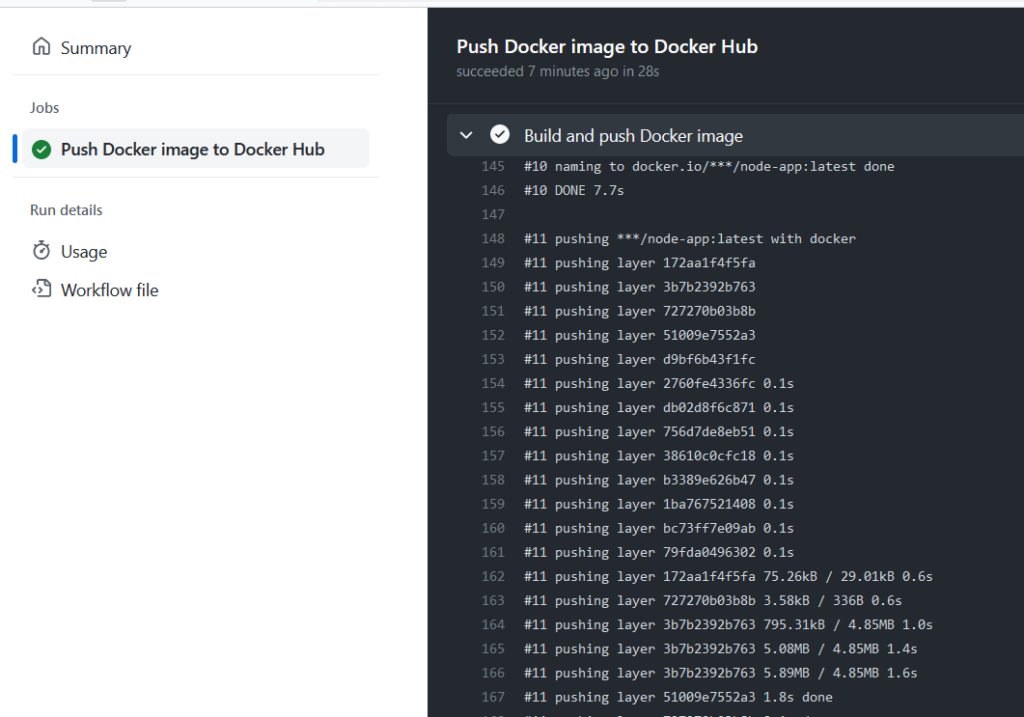
Now our Job got succeeded. we have have completed
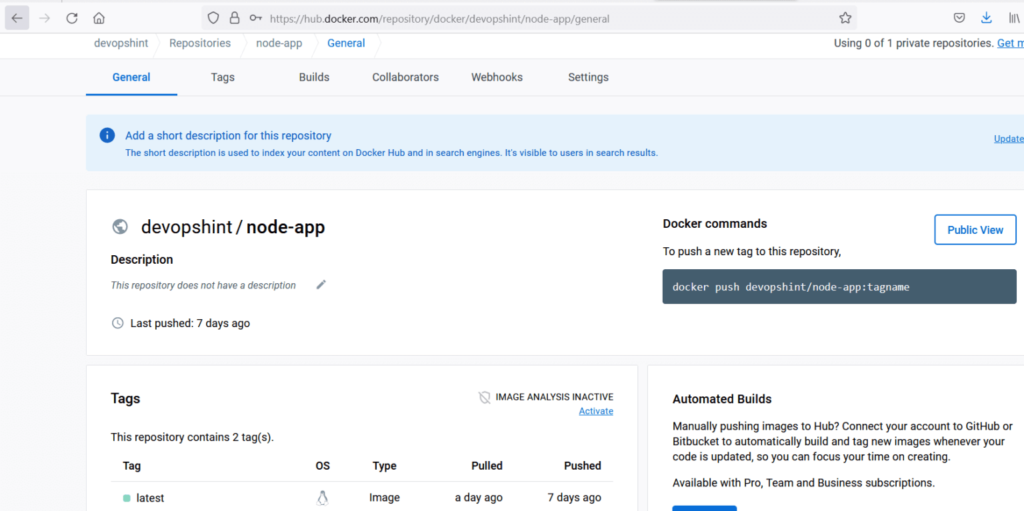
Now you can open the DockerHub repository and check for the final image with the latest tag inside it.
Conclusion:
We have covered Create Dockerfile for Node.js app, Create server.ja and package.json file | How to build and push Docker image to DockerHub using GitHub Actions.
Related Articles:
GitHub Actions Tutorial with Practicals
Reference:

