
In this article, we will demonstrate how to deploy Maven project on Tomcat in Ubuntu 22.04 LTS. This setup allows you to host and run Java web applications efficiently, leveraging the power of popular build tools in a stable and secure environment. By following these steps, you’ll be able to ensure the smooth deployment of your web applications on Tomcat.

What is Apache Maven?
Apache Maven is an open-source build automation and project management tool. It simplifies the process of building, packaging, and managing software projects, particularly in Java. Maven uses a declarative configuration file (pom.xml) to define project structure, dependencies, and build goals. It automates tasks like compilation, testing, and dependency resolution, enhancing the efficiency of software development and project management.
Why is Tomcat often required when working with Maven in web application?
- Web Application Deployment: Tomcat is used to deploy and run web applications, especially those built using Java technologies like Servlets and JSP. Maven, on the other hand, is used to manage the build and dependency management process. After building a web application with Maven, you typically package it into a WAR (Web Application Archive) file, which can be deployed on Tomcat.
- Development and Testing: Developers often use Tomcat as a local development server for testing their web applications during development. Maven helps manage the project and its dependencies, while Tomcat provides a runtime environment for testing. This is especially useful for quickly iterating and testing changes.
- Integration: There are Maven plugins like the Tomcat Maven Plugin that make it easier to manage Tomcat within your build and deployment process. These plugins allow you to start, stop, and deploy your web application to a Tomcat server directly from your Maven build, which can be beneficial for automation and continuous integration.
- Community Standard: Tomcat is widely used in the Java web development community. Many web development practices and tutorials are built around the assumption that you’ll be using Tomcat. This standardization makes it easier to find resources, documentation, and community support when using both Maven and Tomcat.
Prerequisites
Before we begin, make sure you have the following tools installed on your system:
- JDK (Java Development Kit) — version 10 or higher
- Apache Maven — version 3.9.4
- Install Apache Tomcat — version 10 on Ubuntu 220.04 LTS
Step #1:Update System Packages
Before installing Maven, it’s a good practice to update your system’s package list to ensure you’re working with the latest information:
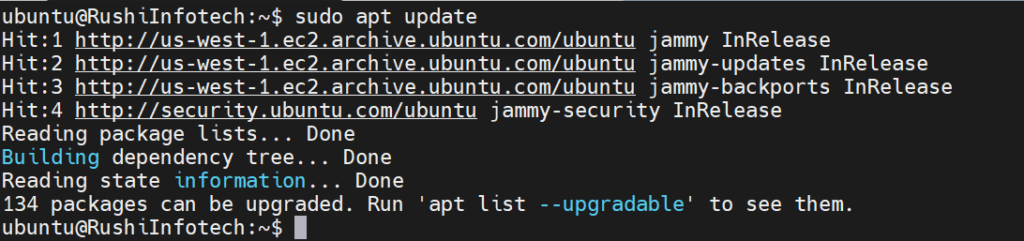
ubuntu@RushiInfotech:~$ sudo apt update
Step #2:Install Java 11 on Ubuntu 22.04 LTS
Maven is a Java-based tool, so you need to have the Java Development Kit (JDK) installed. You can check if Java is already installed by running:
ubuntu@RushiInfotech:~$ java -version
If Java is not installed, you can install it. For this example, we’ll install OpenJDK:

ubuntu@RushiInfotech:~$ sudo apt install openjdk-11-jdk
Verify the installation with:

ubuntu@RushiInfotech:~$ java -version
Step #3:Download Apache Maven on Ubuntu using tar
Visit the Apache Maven website to get the latest download link for Maven and you can download the latest version :

Maven_Version="3.9.4"  # Check for the latest version on the Apache Maven website.
ubuntu@RushiInfotech:~$ sudo wget https://downloads.apache.org/maven/maven-3/3.9.4/binaries/apache-maven-3.9.4-bin.tar.gz
Step #4:Extract Maven on Ubuntu using tar
Now, let’s extract the downloaded archive and move it to the /opt directory:

ubuntu@RushiInfotech:~$ sudo tar -xf apache-maven-3.9.4-bin.tar.gz -C /opt
Step #5:Create Symbolic Links for Maven
Create symbolic links to make Maven easily accessible:

ubuntu@RushiInfotech:~$ sudo ln -s /opt/apache-maven-3.9.4 /opt/maven
ubuntu@RushiInfotech:~$ sudo ln -s /opt/maven/bin/mvn /usr/bin/mvn
Step #6:Verify Maven Installation on Ubuntu
To confirm that Maven is installed and set up correctly, run the following command:

ubuntu@RushiInfotech:~$ mvn -version
You should see Maven’s version information, indicating that it’s successfully installed.
Step #7:Set Environment Variables for Maven on Ubuntu(Optional)
To make Maven available to all users and for all terminal sessions, you can set environment variables. Edit the .bashrc file:


ubuntu@RushiInfotech:~$ nano ~/.bashrc
Add the following lines at the end of the file:
export M2_HOME=/opt/maven
export M2=$M2_HOME/bin
export PATH=$M2:$PATH
Save and exit the text editor (in nano, it’s Ctrl+O to save, and Ctrl+X to exit). Then, refresh your profile:

ubuntu@RushiInfotech:~$ source ~/.bashrc
Step #8:Creating a Maven Project on Ubuntu
First, let’s create a new Maven project with the following command:

ubuntu@RushiInfotech:~$ mvn archetype:generate -DgroupId=com.example -DartifactId=my-webapp -DarchetypeArtifactId=maven-archetype-webapp -DinteractiveMode=false

To display directory in tree structure we need to simply install:
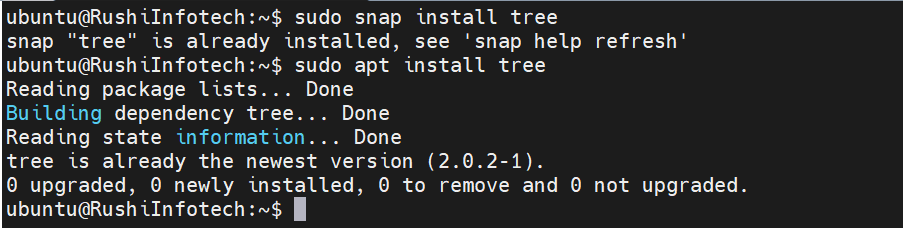
ubuntu@RushiInfotech:~$ sudo snap install tree
ubuntu@RushiInfotech:~$ sudo apt install tree
The above command will generate a new Maven project with the following structure:
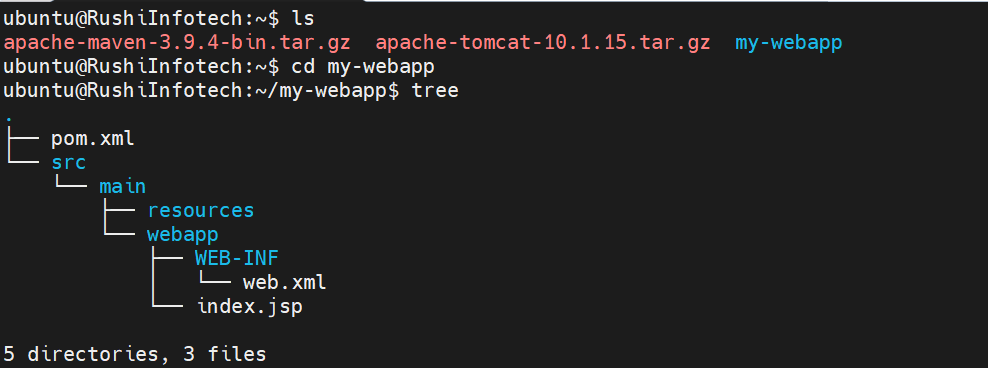
.
├── pom.xml
└── src
    └── main
        ├── resources
        └── webapp
            ├── WEB-INF
            │   └── web.xml
            └── index.jsp
Step #9:Configuring the pom.xml file in Maven on Ubuntu
What is pom.xml?
The pom.xml in Maven is a critical configuration file that defines a project’s structure and settings. It contains information such as project metadata, dependencies, build instructions, and plugins, allowing Maven to manage the project’s build process and dependencies automatically. It serves as a central reference for Maven to execute tasks like compilation, testing, packaging, and deployment.
Now, open the pom.xml file in your project’s root directory and edit with the following plugins and dependencies by typing command:
ubuntu@RushiInfotech:~/my-webapp$ sudo nano pom.xml
Remove the default plugins and dependencies and add this in pom.xml file and also in url command type our Ip address with default port number:8080 and the name of the application created for eg my-webapp:
For example:-
 <url>http://54.215.217.172:8080/my-webapp/hello</url>

<project>
  ...


  <packaging>war</packaging>
...
<!-- From here copy the following plugins and dependencies -->
  <version>1.0-SNAPSHOT</version>
  <name>my-webapp Maven Webapp</name>
  <url>http://54.215.217.172:8080/my-webapp/hello</url>
  <dependencies>
    <dependency>
      <groupId>javax.servlet</groupId>
      <artifactId>javax.servlet-api</artifactId>
      <version>4.0.1</version>
      <scope>provided</scope>
    </dependency>
  </dependencies>
  <build>
     <finalName>${project.artifactId}</finalName>
    <plugins>
      <plugin>
        <groupId>org.apache.maven.plugins</groupId>
        <artifactId>maven-compiler-plugin</artifactId>
        <version>3.8.1</version>
        <configuration>
          <source>1.8</source>
          <target>1.8</target>
        </configuration>
      </plugin>
      <plugin>
        <groupId>org.apache.maven.plugins</groupId>
        <artifactId>maven-war-plugin</artifactId>
        <version>3.3.1</version>
      </plugin>
    </plugins>
  </build>
Save the file by entering Control + x and Shift +y and press enter.
Step #10:Creating a Simple Java Servlet file in Maven
Let’s create a simple servlet to handle HTTP requests.
Create a new directory src/main/java/com/example/ and add a new file named HelloServlet.java:

ubuntu@RushiInfotech:~/my-webapp$ sudo mkdir -p src/main/java/com/example/
ubuntu@RushiInfotech:~/my-webapp$ sudo touch src/main/java/com/example/HelloServlet.java
ubuntu@RushiInfotech:~/my-webapp$ cd /src/main/java/com/example/
ubuntu@RushiInfotech:~/my-webapp/src/main/java/com/example$ ls
HelloServlet.java
Add the following content in HelloServlet.java:
ubuntu@RushiInfotech:~/my-webapp/src/main/java/com/example$ sudo nano HelloServlet.java

package com.example;

import java.io.IOException;
import javax.servlet.ServletException;
import javax.servlet.annotation.WebServlet;
import javax.servlet.http.HttpServlet;
import javax.servlet.http.HttpServletRequest;
import javax.servlet.http.HttpServletResponse;

@WebServlet(name = "HelloServlet", urlPatterns = {"/hello"})
public class HelloServlet extends HttpServlet {

    @Override
    protected void doGet(HttpServletRequest request, HttpServletResponse response)
            throws ServletException, IOException {
        response.setContentType("text/html;charset=UTF-8");
        response.getWriter().println("<h1>Hello, World!</h1>");
    }
}
Step #11:Building the Web Application in Maven on Ubuntu
To build the web application, run the following command in your project’s root directory:

ubuntu@RushiInfotech:~/my-webapp$ mvn clean package
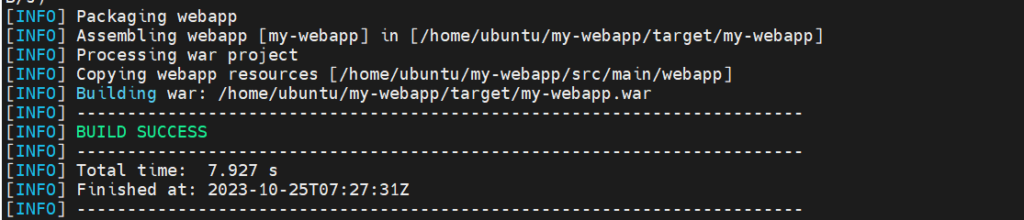
This command will compile the Java code, package the application into a WAR file (my-webapp.war), and place it in the target directory.
Step #12:Deploying the Web Application on Tomcat
Now that we have the WAR file, we can deploy it to the Tomcat server. To do this, follow these steps:
- Copy the
my-webapp.warfile from thetargetdirectory to thewebappsdirectory in your Tomcat installation:

ubuntu@RushiInfotech:~/my-webapp$ cd target
ubuntu@RushiInfotech:~/my-webapp/target$ sudo cp my-webapp.war /opt/tomcat/webapps/
Check once if the file is copied or not and if it is displaying Permission Denied then give permission to webapps and also my-webapp:-

ubuntu@RushiInfotech:/opt/tomcat$ sudo chmod 777 webapps
ubuntu@RushiInfotech:/opt/tomcat/webapps$ sudo chmod 777 my-webapp
- Start the Tomcat server if it isn’t already running. You can start it by running the command:

ubuntu@RushiInfotech:/opt/tomcat$ sudo ./bin/catalina.sh start
Open your browser and navigate to the following URL: http://54.215.217.172:8080/my-webapp/
You should see a web page with the text “Hello, World!” displayed.

Conclusion:-
Deploying a Maven project on Tomcat in Ubuntu Server 22.04 LTS is a vital process for web application development and deployment. By following the outlined steps in this article, you can seamlessly integrate the capabilities of Apache Maven for project management and Apache Tomcat as a reliable web server and servlet container.
Reference:-
For reference visit the official website Apache Tomcat, Apache Maven.
Any queries pls contact us @Rushi Infotech.
![Java 17 Installation on Ubuntu 22.04 LTS [5 Steps]](https://rushiinfotech.in/wp-content/uploads/2023/09/Add-a-heading.png)
![Java 18 Installation on Ubuntu 20.04 LTS using curl [5 Steps]](https://rushiinfotech.in/wp-content/uploads/2023/09/Java-18-Installation-on-Ubuntu-22.04-LTS-1.png)