
To download and install Git on a Windows system, follow these steps:
1. Download the Installer:
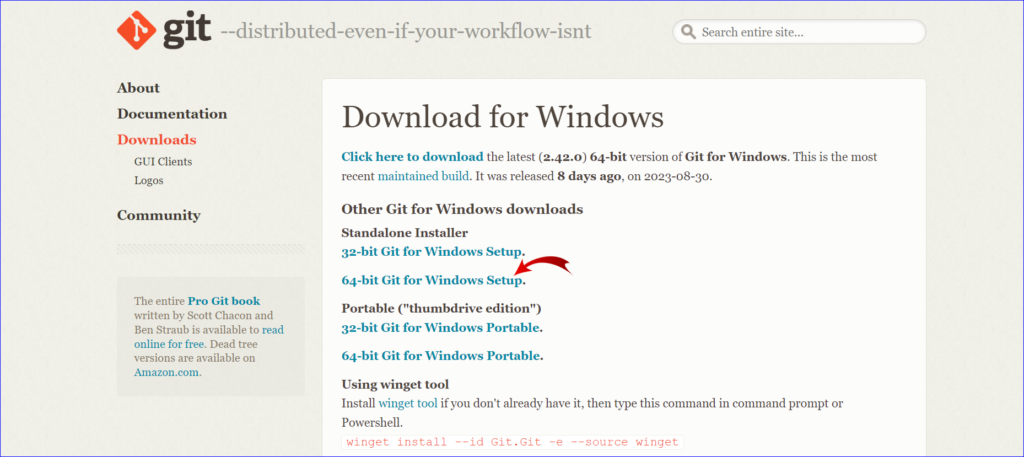
Visit the official Git for Windows download page at https://git-scm.com/download/win.
Click on the “Download” button to download the latest version of the Git installer for Windows.
2. Run the Installer:
Locate the downloaded .exe file, which is usually in the “Downloads” folder.
Double-click on it to start the installation process.

3. Follow the Installation Wizard:
i. Select Components: The installer will provide several options, including Windows Explorer integration, Git Bash (a command-line tool), and Git GUI (a graphical interface). You can leave the default selections or modify them based on your needs.

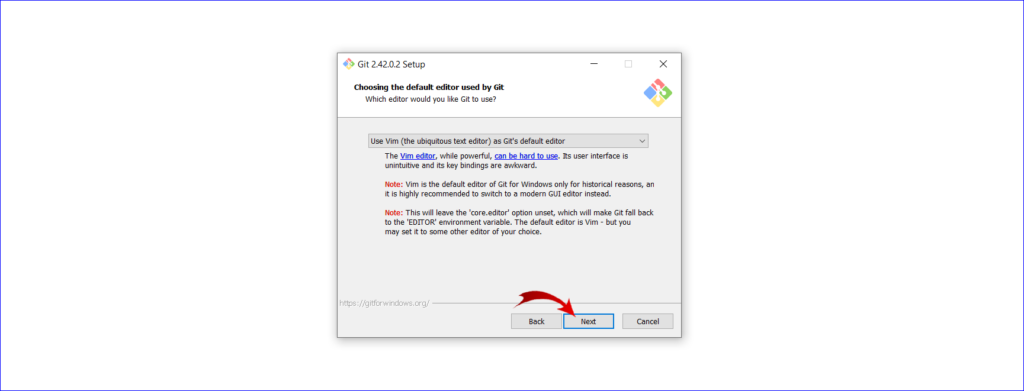
ii. Choose the Default Editor: Git’s default editor is Vim. If you’re not familiar with Vim, you might opt for a more user-friendly option like Nano or even Notepad++.
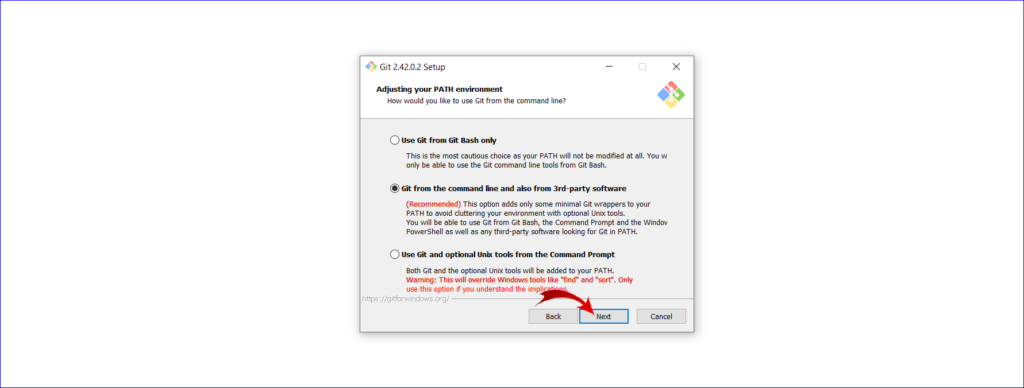
iii. Adjust your PATH environment: It’s recommended to choose “Git from the command line and also from 3rd-party software.” This option will let you use Git from both Git Bash and the Windows Command Prompt.
iv. Choose the HTTPS transport backend: You can typically select the default option here.

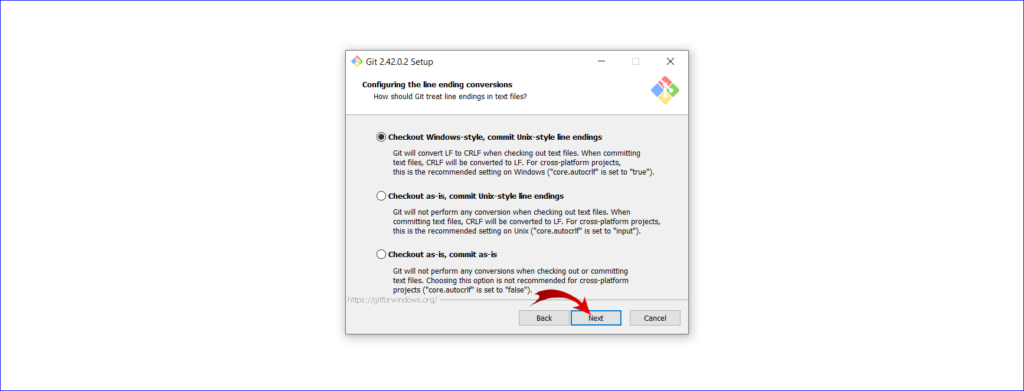
v. Configure line ending conversions: For most users, the recommended option is “Checkout Windows-style, commit Unix-style line endings.”
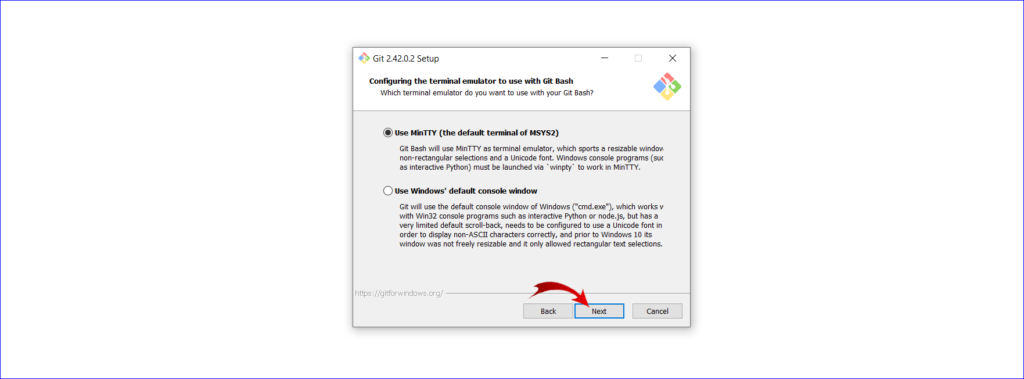
vi. Choose the terminal emulator: Opting for “Use MinTTY (the default terminal of MSYS2)” is a common choice, but you can also use the Windows default console if preferred.
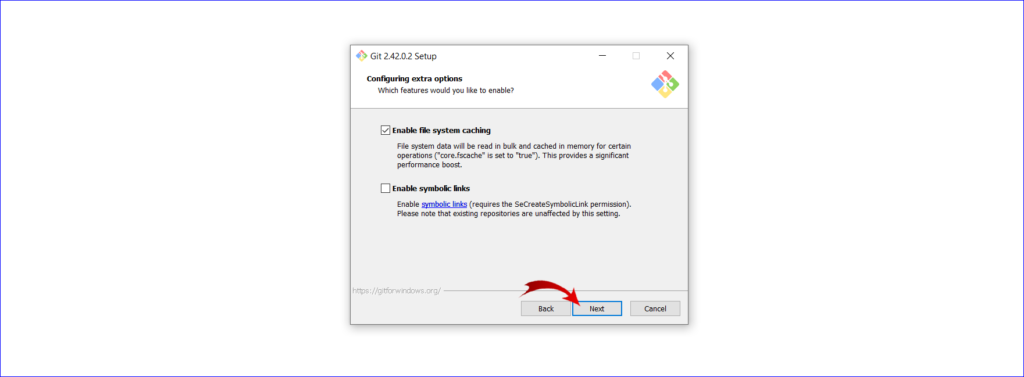
vii. Configure extra options: The default selections are generally suitable for most users.
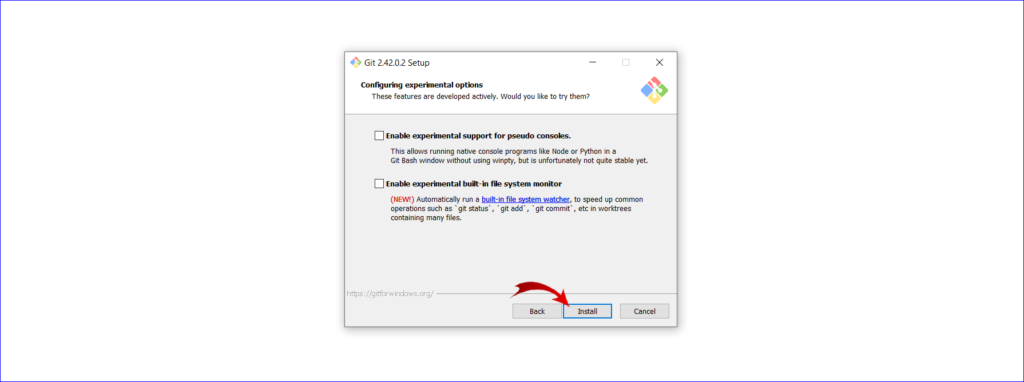
4. Complete the Installation:
i. Click “Install” to proceed with the installation.
ii. Once installation is finished, you might see options to view the release notes or launch Git Bash. You can choose based on your preference.

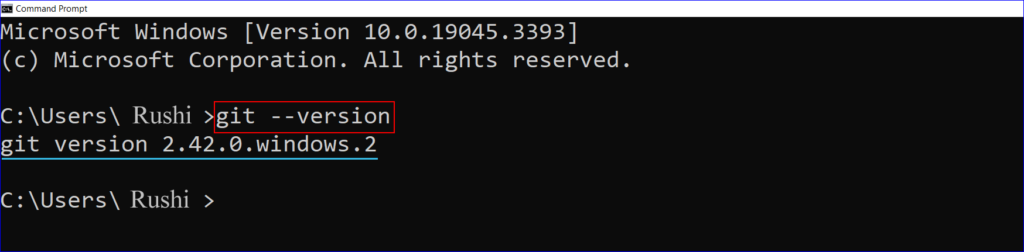
5. Verify Installation:
i. You can ensure Git was installed correctly by opening the Command Prompt or Git Bash and typing:git --version
This command should display the version of Git you’ve installed.
6. (Optional) Configure Git:
If you’re using Git for the first time on your machine, it’s a good idea to set your Git username and email. Open Git Bash or Command Prompt and enter:
bash git config –global user.name “Your Name” git config –global user.email “your.email@example.com”
With these steps completed, Git is now installed on your Windows machine, and you’re ready to begin using it for version control tasks.