git stash is a command in Git that allows you to temporarily save changes that you don’t want to commit immediately. It takes your modifications, saves them away for later use, and then reverts your working directory to match the HEAD commit.
The primary use cases for git stash include:
- Switching Context: You’re in the middle of working on something, but need to switch to a different task or branch. Stashing lets you save your progress and come back to it later.
- Pulling the Latest Changes: If you have local changes and want to pull the latest changes from a remote without committing your own, you can stash your changes, perform the pull, and then reapply your stashed changes.
- Cleaning up for a Branch Switch: If you’re working in one branch and want to switch to another, but your current branch’s changes aren’t ready for a commit, you can stash them. Once you’re done with the other branch, you can switch back and pop your stashed changes.
Basic git stash commands:
1. Save Changes: git stash save "Optional message" or simply: git stash

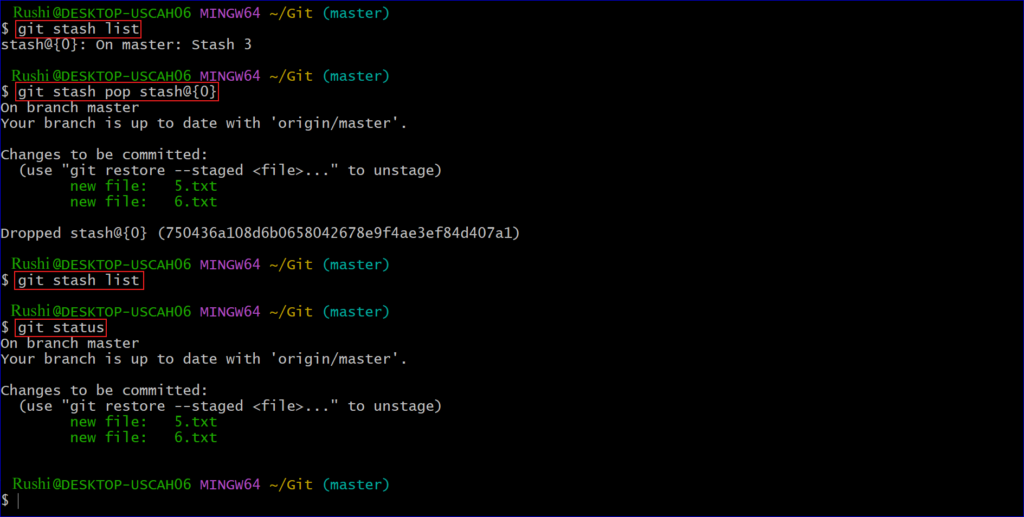
2. List Stashes: This displays the list of stashed changes. git stash list
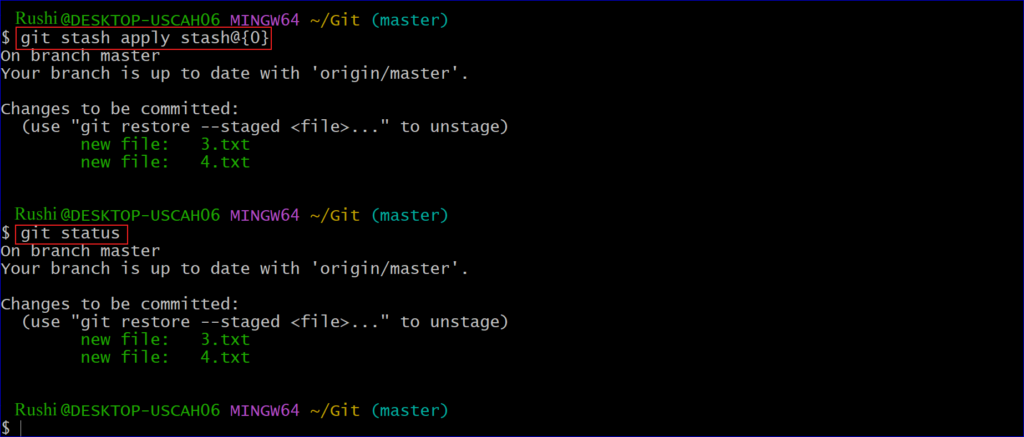
3. Apply Stashed Changes: This reapplies the most recent stashed changes. The changes remain in the stash list, useful if you want to apply the same stashed changes to multiple branches. git stash apply
4. Pop Stashed Changes: This reapplies the most recent stashed changes and removes them from the stash list. git stash pop
5. Drop a Stash: If you decide you no longer need a set of stashed changes, you can remove them with: git stash drop stash@{n} where {n} is the stash number.

6. Clear All Stashes: To remove all stashed entries: git stash clear
7. Apply a Specific Stash: If you have multiple stashes and want to apply changes from a specific stash:bash git stash apply stash@{n}
It’s worth noting that while git stash is a powerful tool, it’s also a temporary one. Stashes are not meant to last long-term, and they don’t get transferred when you clone a repository. Therefore, if you have significant changes, it’s often better to create a new branch and commit your changes there rather than relying heavily on stashing.
Git Tags:
Certainly! Git tags are a way to mark specific points in your repository’s history as important, often used to denote release points (v1.0, v1.1, etc.). Below are some notes on Git tags:
What is a Git Tag?
- Reference Point: A tag is a reference to a specific commit in the repository’s history.
- Immutable: Unlike branches, which can move as you commit, once a tag is set on a commit, it generally doesn’t move (unless explicitly done so).
- Types: There are two types of tags in Git:
- Lightweight tags: Like a branch, it’s a reference to a specific commit.
- Annotated tags: Stored as full objects in the Git database. They’re checksummed, contain the tagger name, email, and date; have a tagging message; and can be signed and verified with GNU Privacy Guard (GPG).
Common Commands:
- Creating an Annotated Tag:
git tag -a v1.0 -m "Version 1.0 release"-a stands for “annotated” and -m allows you to add a tagging message.
- Creating a Lightweight Tag:
git tag test0 "Commit ID"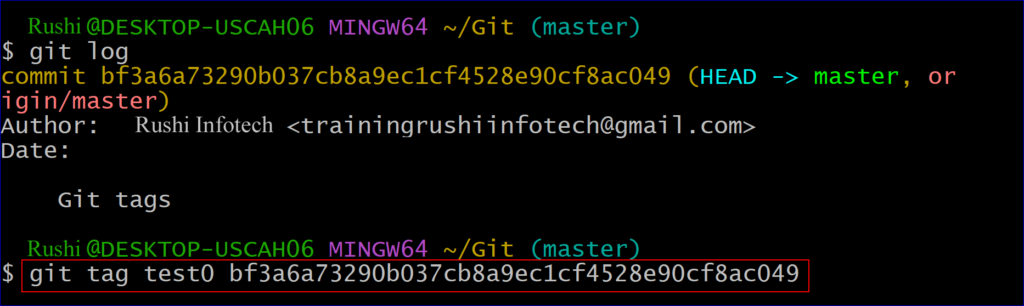
- Listing Tags:
git tag
- Viewing Tag Details: To view the commit associated with a tag and the tagging message:
git show test0
- Pushing Tags to a Remote: Tags are NOT automatically pushed to remote repositories. To push a tag:
git push origin test0
To push all tags at once:
git push origin --tags
- Checking Out Tags: While you can “checkout” a tag like you would a branch, doing so puts you in a “detached HEAD” state. This means you’re not on a specific branch, and any changes made and committed won’t belong to any branch and may be lost.
git checkout test0
- Deleting a Tag: To delete a local tag:
git tag -d test0
To delete a tag from a remote repository:
git push origin :refs/tags/v1.0
Use Cases:
- Releases: One of the most common uses for tags is to mark specific commits as release points.
- Historical Reference: Sometimes you might want to mark certain commits for reference, e.g., a last-known good state, the point where a feature was added, etc.
Best Practices:
- Semantic Versioning: Many projects use Semantic Versioning as a way to version software. E.g., v1.2.3 where 1 is the major version, 2 is the minor version, and 3 is the patch version.
- Annotated over Lightweight: Prefer annotated tags over lightweight ones for more significant milestones like releases. They provide more information, including the tagging message and date, and can be GPG-signed.
- Signing Tags: For security reasons, especially in open-source projects, it’s a good practice to GPG-sign your tags to ensure that the tag hasn’t been tampered with.
Important Points:
- Immutability: While you can technically move or delete tags, it’s generally frowned upon, especially in shared or public repositories. Doing so rewrites history, which can create confusion and issues for others.
That covers the basics and some best practices related to Git tags.
Alias Commands:
Git aliases allow you to create shortcuts for longer or frequently-used Git commands. This can help streamline your workflow and make it more efficient. Below are some notes on creating and using Git aliases:
Creating Git Aliases:
- Using
git config:
You can use thegit configcommand to define an alias. For instance, if you want to create a shortcut for git log as git l, you’d use:
git config --global alias.l log

- Editing
.gitconfigDirectly:
You can directly add aliases in your.gitconfigfile, which is usually located in your home directory (~/.gitconfigon UNIX-based systems).
   [alias]
       l = log
3. Short Status:
git config --global alias.s status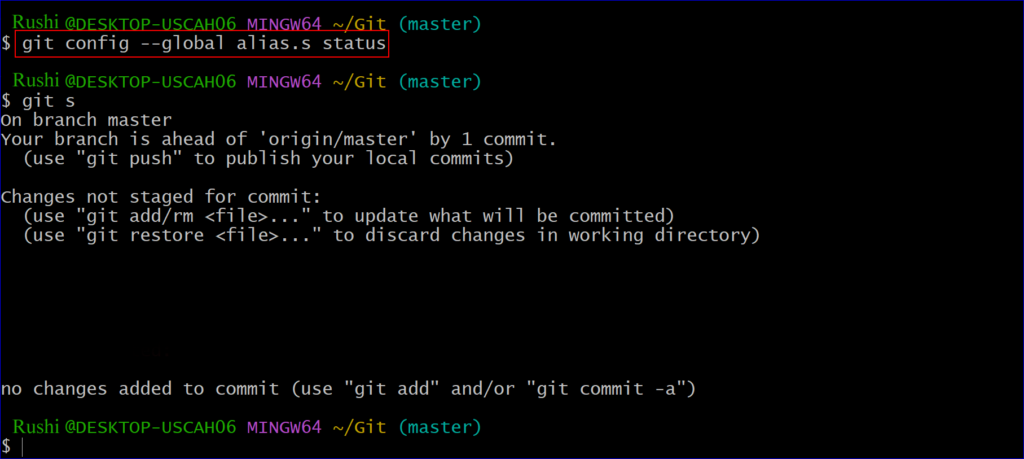
Some Useful Git Aliases:
Here are some commonly used aliases that developers find handy:
Verbose Log:
git config --global alias.lg "log --oneline --graph --decorate"This shows the commit logs in a concise one-line format, with a graph of commits on the left and commit refs decorated with branch and tag names.
- Commit:
git config --global alias.ci commit- Checkout:
git config --global alias.co checkout- Branch:
git config --global alias.br branch- Unstage (remove from index):
git config --global alias.unstage "reset HEAD --"- Last Commit:
git config --global alias.last "log -1 HEAD"Advanced Aliases:
- See Unpushed Commits:
git config --global alias.unpushed "log --branches --not --remotes"- Interactive Rebase:
An alias to start an interactive rebase for the lastncommits:
git config --global alias.ri "rebase -i HEAD~"- Alias with Parameters:
Aliases can also accept parameters by using a shell function. For instance, to create an alias that deletes a branch both locally and remotely:
git config --global alias.delbr '!f() { git branch -d $1 && git push origin --delete $1; }; f'Important Points:
- Scope: Aliases can be defined for the current repository (omit
--global) or globally for all repositories (with--global). - Override: Git will not let you override its built-in commands with an alias of the same name. This is a safety feature to prevent unintentional behavior.
- Flexibility: Aliases can be as simple as shortening a long command or as complex as combining multiple Git commands using a function.
Git aliases are a powerful feature for personalizing and optimizing your Git workflow. By defining your own or adopting commonly-used aliases, you can make your interactions with Git more efficient and intuitive.
Difference between Git Pull and Git Fetch:
git pull and git fetch are two fundamental Git commands used for interacting with remote repositories, but they serve different purposes. Let’s break down their differences:
1. Basic Function:
git fetch: Fetches the latest changes from the remote repository to your local machine, but it does not automatically merge them with your current branch. Instead, it updates the remote-tracking branches (typically references likeorigin/master,origin/feature-branch, etc.).git pull: Essentially a combination ofgit fetchfollowed bygit merge. It fetches the latest changes from the remote repository and automatically tries to merge them into your current branch. If you’re using rebase workflows, you might also encountergit pull --rebase, which is essentiallygit fetchfollowed bygit rebase.
2. Use Cases:
git fetch:- When you want to see the changes in the remote repository before integrating them into your local branch.
- When you want to keep your local repository updated with the remote changes but not immediately merge them.
git pull:- When you want to update your current branch with the latest changes from its upstream counterpart.
- Useful for keeping feature branches up to date with a main or develop branch.
3. Branch Updates:
git fetch: Only updates the information about the remote branch, not your current branch or working directory. You’d typically see the updates as remote-tracking branches.git pull: Updates your current branch by merging in the changes from the corresponding remote branch.
4. Safety:
git fetch: Considered safer for reviewing changes since it does not alter your working directory or current branch.git pull: Can potentially lead to merge conflicts if there are conflicting changes between the local and remote branches.
5. Flexibility:
git fetch: Allows for flexibility in integrating changes. After fetching, you can decide to merge, rebase, or just inspect the changes.git pull: Automatically attempts to integrate the changes, which might not always be the desired action, especially in complex branch workflows.
Summary:
In essence, while both commands are used to retrieve updates from a remote repository:
git fetchallows you to retrieve changes without immediately integrating them.git pullfetches the changes and integrates them into your current branch.
It’s often a good practice to use git fetch followed by a separate integration step (like git merge or git rebase) for more control, especially in collaborative environments.