Creating an AWS IAM (Identity and Access Management) user is a fundamental task when managing AWS resources. IAM allows you to manage users and their permissions in AWS, making sure that each user has the correct level of access.
Here’s a step-by-step guide to creating an AWS IAM user:
1. Sign in to the AWS Management Console:
- Navigate to the AWS Management Console and log in with your administrative credentials.

2. Open the IAM Dashboard:
- In the AWS services search bar, type “IAM” and select the “IAM” service to open the IAM dashboard.

3. Navigate to Users:
- In the IAM dashboard’s left navigation pane, click on “Users”.

4. Create User:
- Click on the “Create user” button at the top of the page.

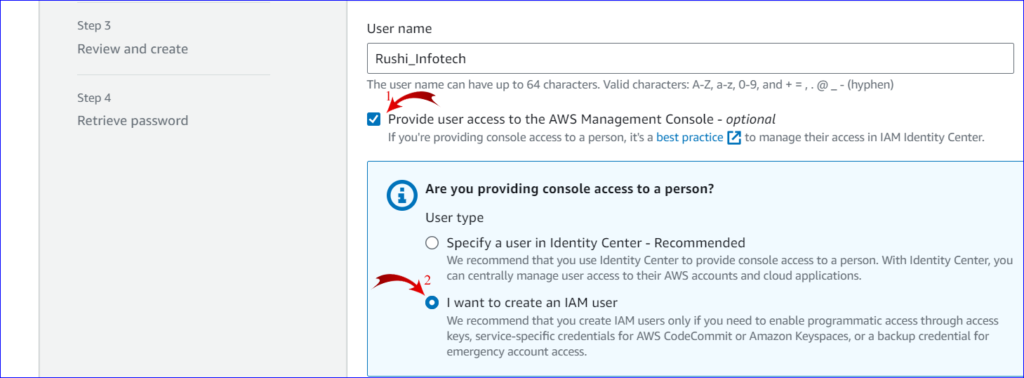
5. User Details:
- Enter the desired username.
- Choose the type of access for the user:
- Programmatic access: Provides an access key ID and secret access key for the AWS API, CLI, SDK, and other development tools.
- AWS Management Console access: Provides a sign-in URL and login credentials to access the AWS Console.
6. Set Permissions:
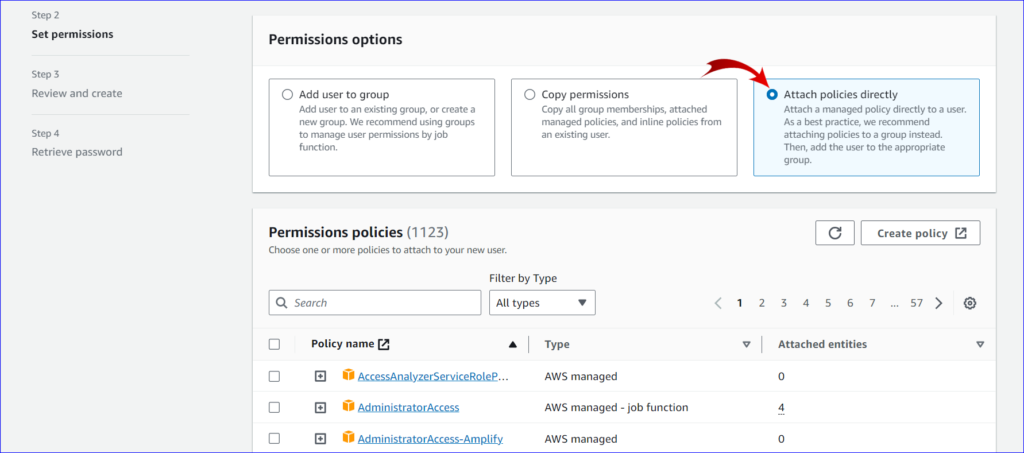
- Choose one of three methods to assign permissions:
- Attach existing policies directly: This is the easiest method. Here, you can attach managed policies directly to the user. Search for policies like
AdministratorAccess,ReadOnlyAccess, etc., and attach as needed. - Add user to group: If you’ve predefined IAM groups with policies, you can add your user to one or more of these groups.
- Attach customer managed policies: If you’ve created custom policies, you can attach them here.
- Attach existing policies directly: This is the easiest method. Here, you can attach managed policies directly to the user. Search for policies like
7. Configure Tags (Optional):
- Add metadata to the user by attaching key-value pairs (tags). This can be useful for tracking purposes.
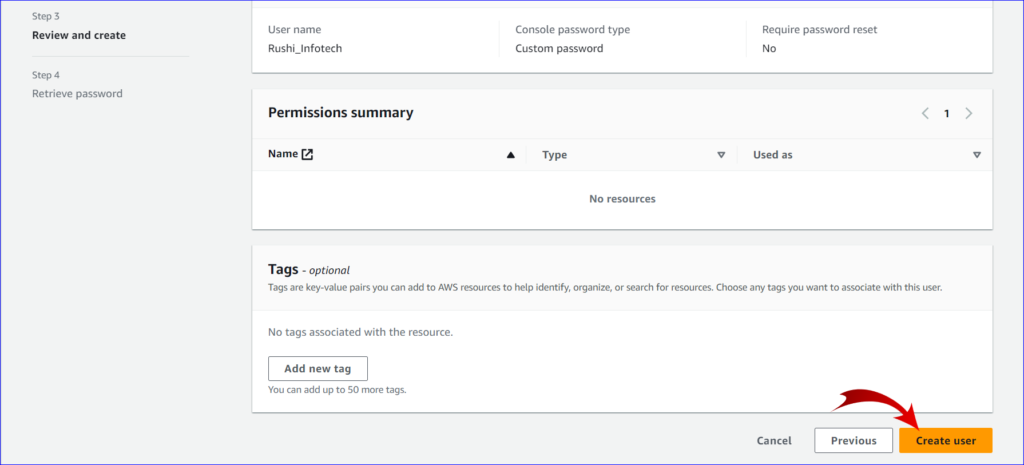
8. Review:
- Review the user details and permissions. Ensure everything is as desired.
9. Create User:
- Click on the “Create user” button.
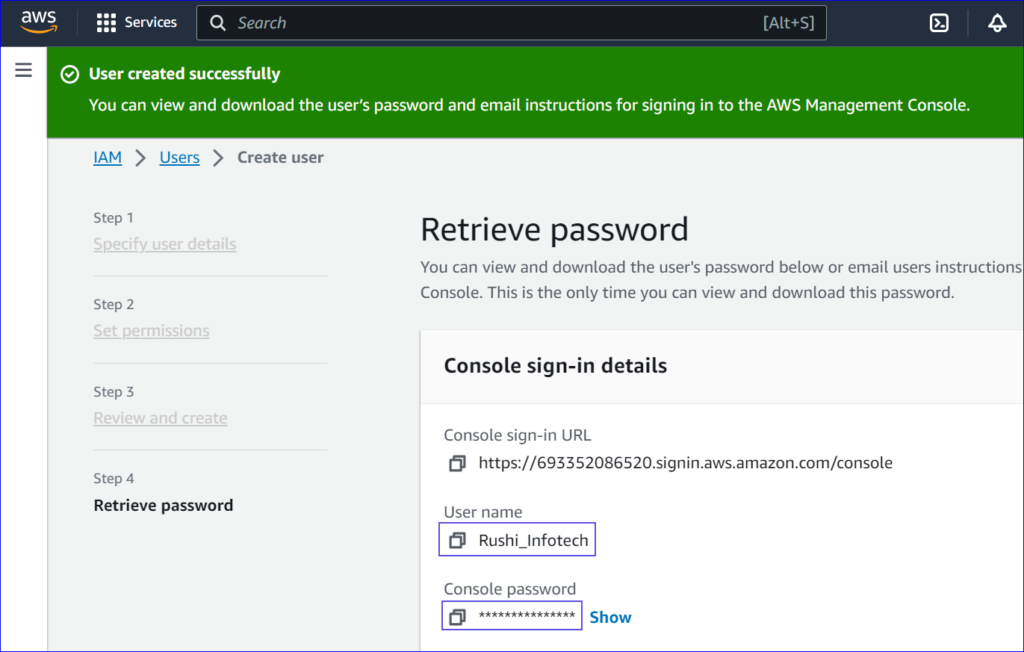
10. Capture Credentials:
- After creating the user, you’ll be presented with the user’s access credentials.
- Important: If you’ve granted Programmatic access, make sure to download the
.csvfile or capture the Access key ID and Secret access key now, as you won’t be
able to view the secret access key again. - If Console access is granted, note the provided sign-in URL.
Always remember to follow the principle of least privilege (PoLP) when assigning permissions. Grant only the permissions necessary to perform a task. Avoid using root user credentials for daily tasks; instead, use IAM users with appropriate permissions.

