- Introduction
- Prerequisites
- Steps to Launch EC2 Ubuntu 22.04 Instance
Introduction:
Amazon EC2 (Elastic Compute Cloud):
Amazon Elastic Compute Cloud (EC2) is a web service that provides resizable compute capacity in the cloud. It is designed to make web-scale cloud computing easier for developers.
Instance Lifecycle:
– Launching: Start and set up a new virtual server in the cloud.
– Connecting: Access the instance just like you would with a traditional server.
– Stopping/Starting: Just like turning off or on a physical machine, but with the flexibility of maintaining its data on attached storage.
– Terminating: When you are done with an instance, you can shut it down, effectively deleting the virtual server and stopping any additional charges.
Prerequisites:
1. AWS Account: You must have an Amazon Web Services (AWS) account. If you don’t have one, you can sign up on the AWS website.
Steps to Launch EC2 Ubuntu 22.04 Instance:
To create an EC2 instance running Ubuntu 22.04 on AWS, follow the steps below:
1. Log in to the AWS Management Console:
Navigate to AWS Console.
https://console.aws.amazon.com/
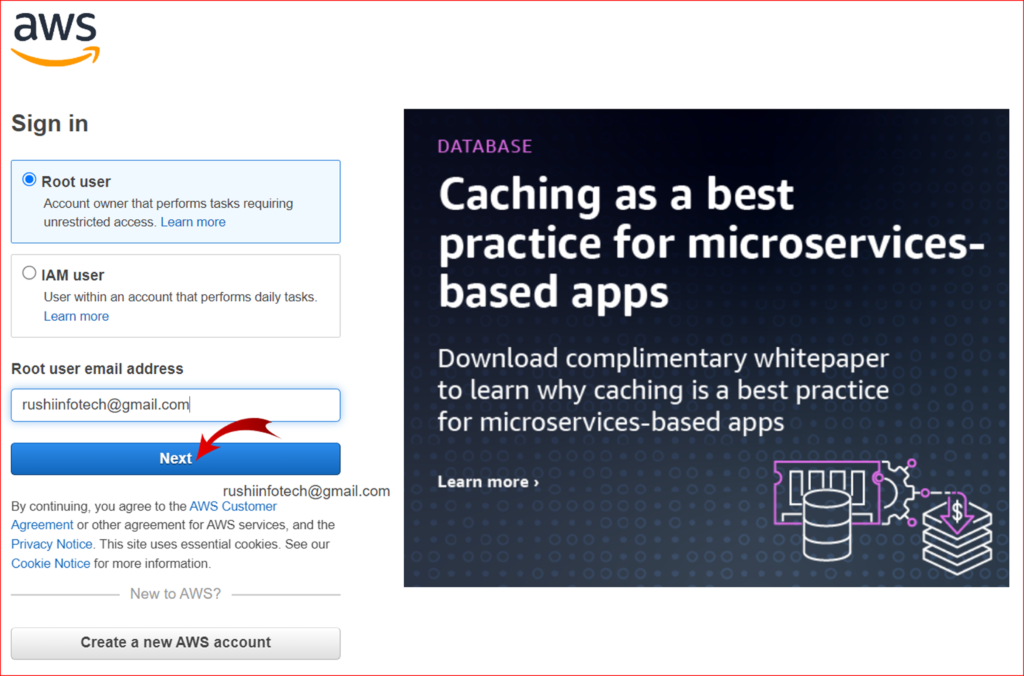
Enter your credentials to log in.

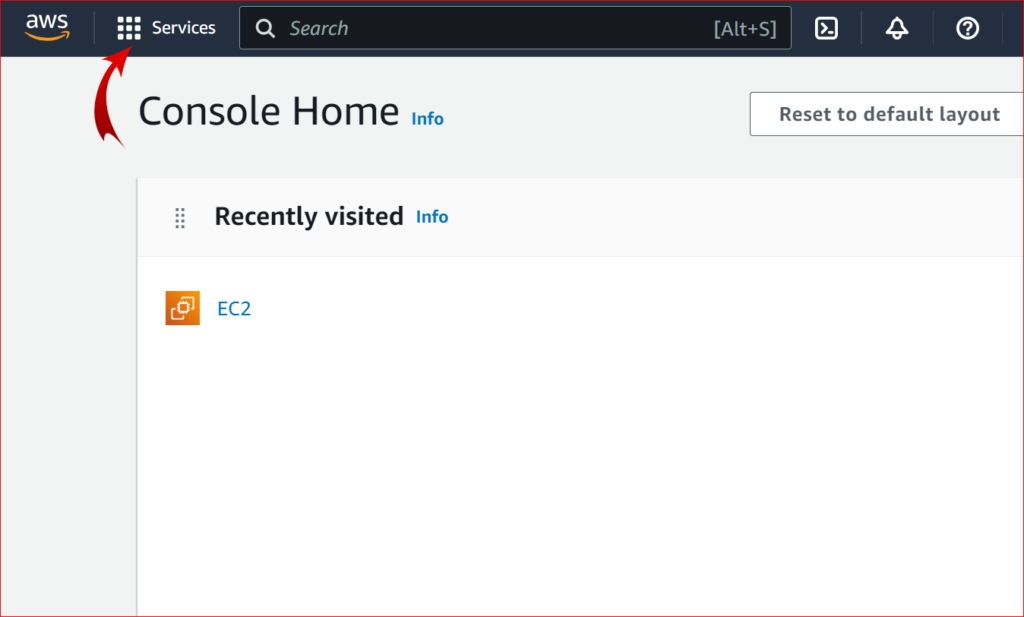
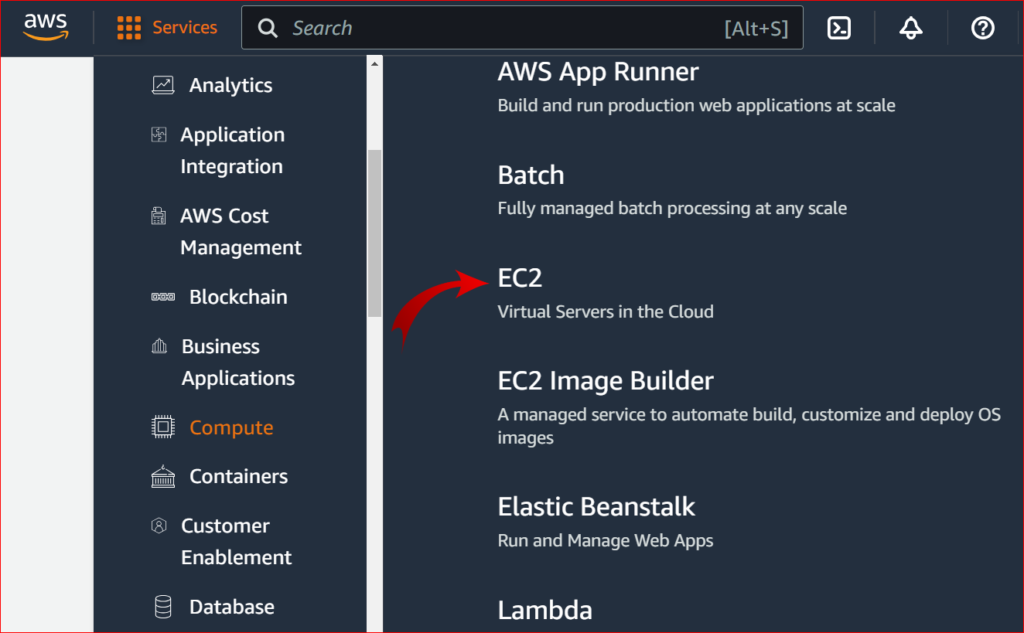
2. Access the EC2 Dashboard:
On the AWS Management Console, click on “Services” at the top left corner.
Under the “Compute” section, click on “EC2”.
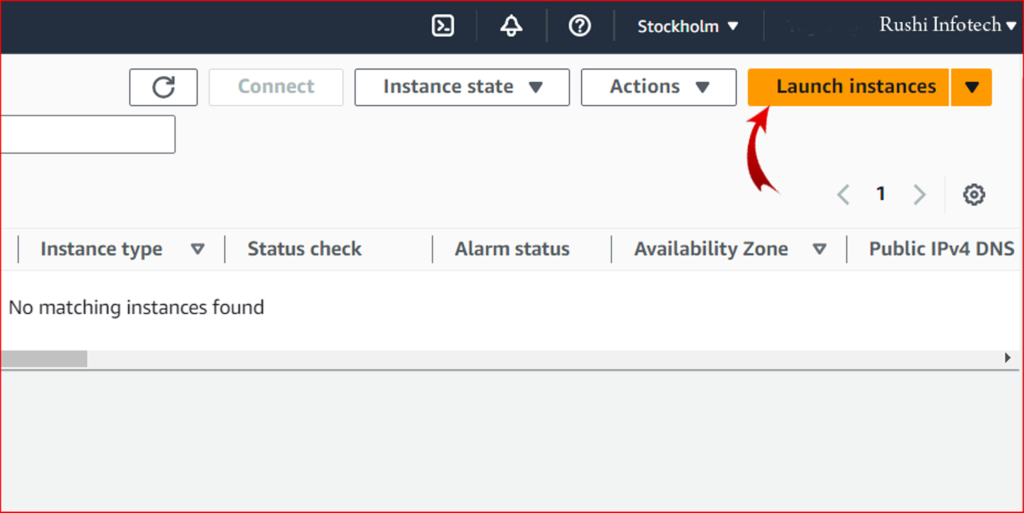
3. Launch a New Instance:
Click the “Launch Instance” button. Which is on Top Right Corner
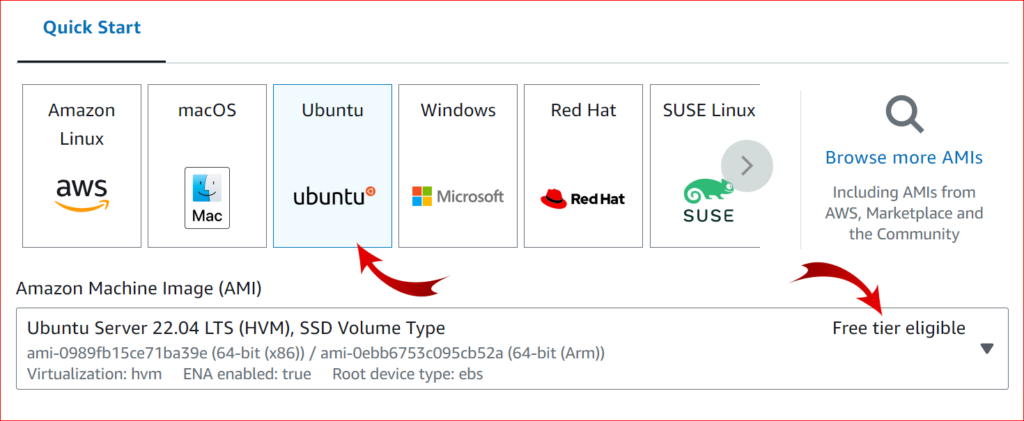
4. Choose an Amazon Machine Image (AMI):
In the “Quick Start” list, you might see Ubuntu Server versions. If you don’t see Ubuntu 22.04,
switch to the “AWS Marketplace” or “Community AMIs” tab and search for “Ubuntu 22.04”.
Select the desired Ubuntu 22.04 AMI from the list.
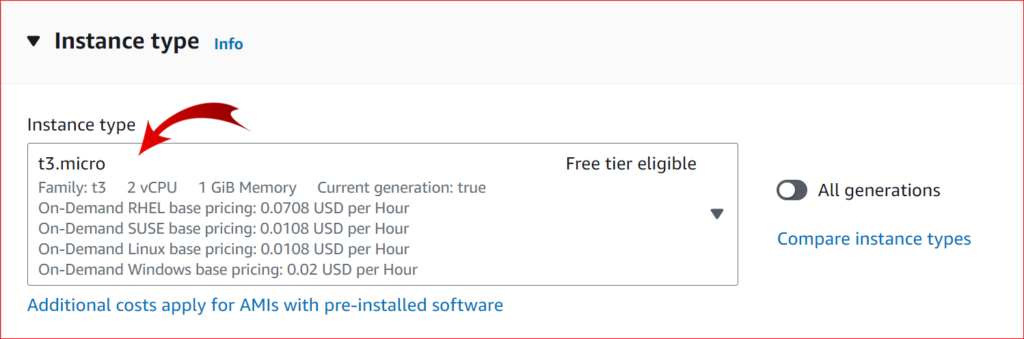
5. Choose an Instance Type:
The t3.micro instance type is eligible for the free tier (if you’re still under the 12-month free tier limit). Choose the desired instance type based on your requirements, then click “Next: Configure Instance Details”.
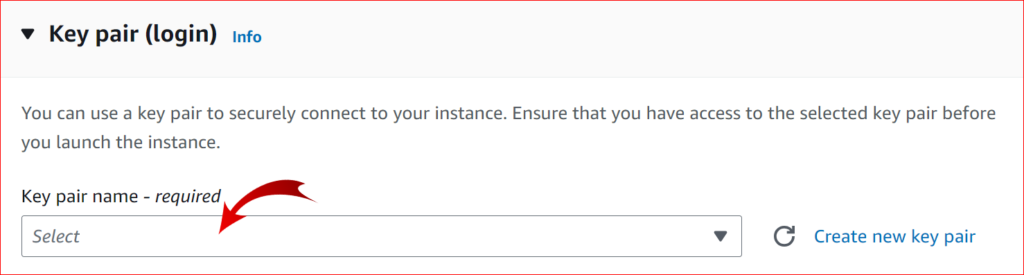
6. Select Key Pair:
In the pop-up window, choose an existing key pair or create a new one.
7. Configure Instance Details:
Here you can set various parameters, like the number of instances, network, subnet, etc.
Most users can leave the default settings for a basic instance.

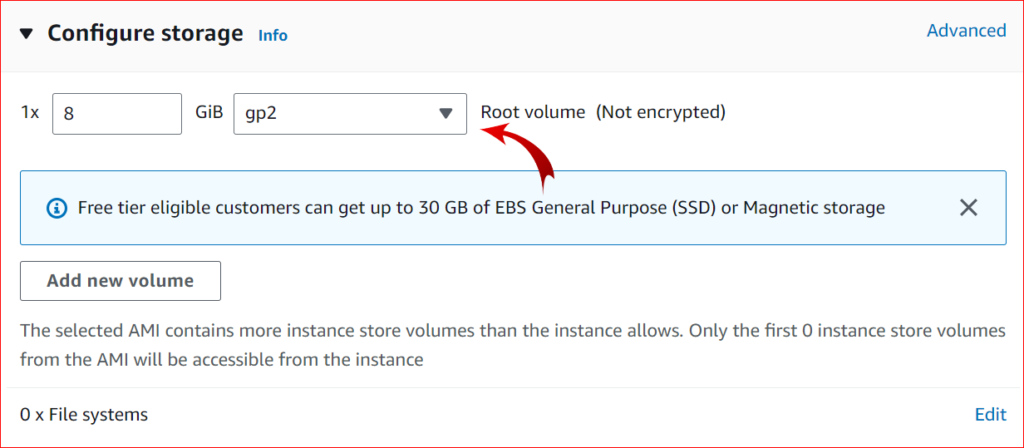
8. Add Storage:
Adjust the size of the root volume or add additional volumes as needed.
9. Add Tags (optional):
Tags can be used to label your instance, like Name: Rushi-Infotech.

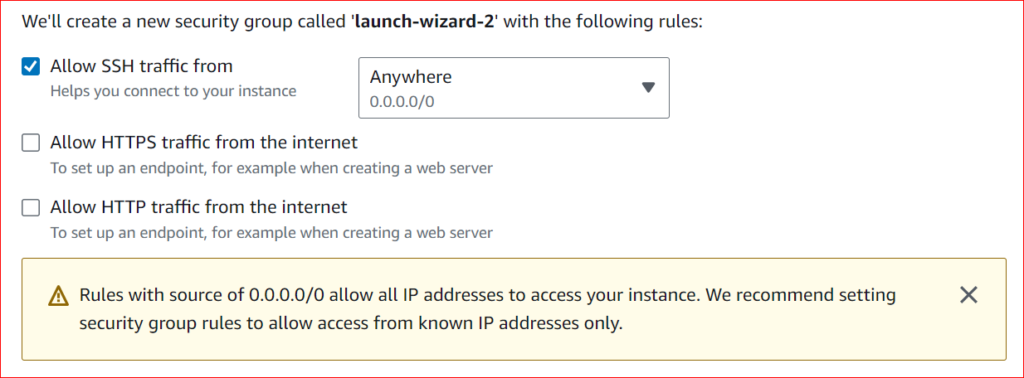
10. Configure Security Group:
By default, the security group will allow SSH traffic from any IP (0.0.0.0/0). For security purposes, you might want to restrict SSH access to your IP only.
If you plan to run a web server, you can also add rules to allow HTTP and HTTPS traffic. and Launch”.
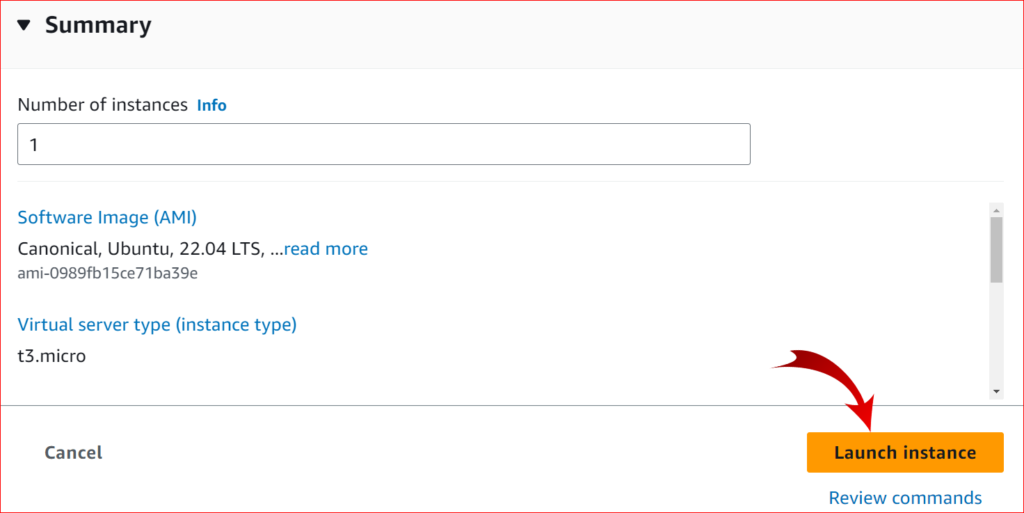
11. Review and Launch:
Review your instance configuration.
Click the “Launch” button.
1. If creating a new key pair: name it, download it, and keep it safe. You’ll need this key pair to SSH into your instance.
Check the acknowledgment box that says you have the private key.
Click “Launch Instances”.
2. Access the Instance:
Go back to the EC2 dashboard and click on “Instances” on the left sidebar.
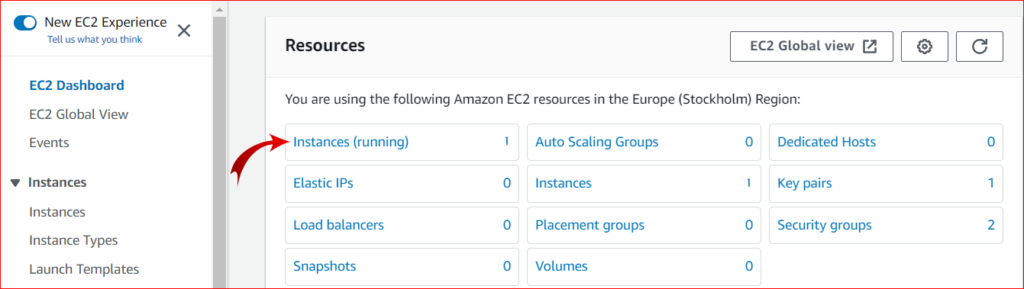
You should see your new instance starting up. Once it’s running and checks have passed, you can SSH into it using your key pair.

- Please Make Sure to Stop the Instances if there is no need of those Instances.

Note: Always ensure your EC2 instances and security groups are correctly configured to maintain security.