Similar Posts
A Step-by-Step Guide: How to Create an Amazon RDS Instance [11 Steps]
You need to be logged in to view this content. Please Log In. Not a…
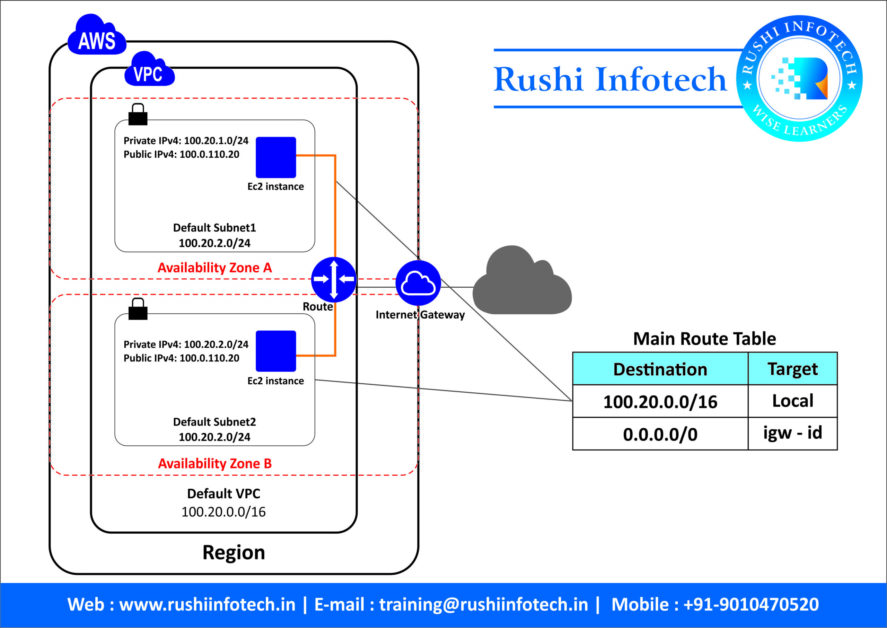
How to Create VPC in AWS Step by Step Guide
You need to be logged in to view this content. Please Log In. Not a…
Effortless Removal: Uninstalling AWS CLI from Your Linux Server
You need to be logged in to view this content. Please Log In. Not a…
Connecting to Amazon RDS with phpMyAdmin: Easy Steps: 7 steps
You need to be logged in to view this content. Please Log In. Not a…